
Gunpla: Getting into Gundam Models

By Brandon Masters
With the recent (and still ongoing) once-in-a-lifetime global pandemic still raging to some level, a lot of people have had more free time to find new hobbies. If you’re looking for a particularly good time sink and something with results you can show off, there’s always Gundam plastic model kits or Gunpla.
In this (admittedly long) article, we will look at the different kinds of model kits available, how to build a kit, what accessories you can consider using while building the kit, and even tips and tricks I’ve run into over the years.
Before we get started, I would like to say thanks to Dalong.net for being an unending source of images and reviews about Gunpla from the earliest days of the hobby to the bleeding edge of model kits. It’s an amazing website, and we have borrowed some of their images for this article when necessary.
Check them out! While the website is in Korean, there is an English version for the kit lists and main pages. At the very least, you might be able to find a kit you wanna try out from the extensive catalog.
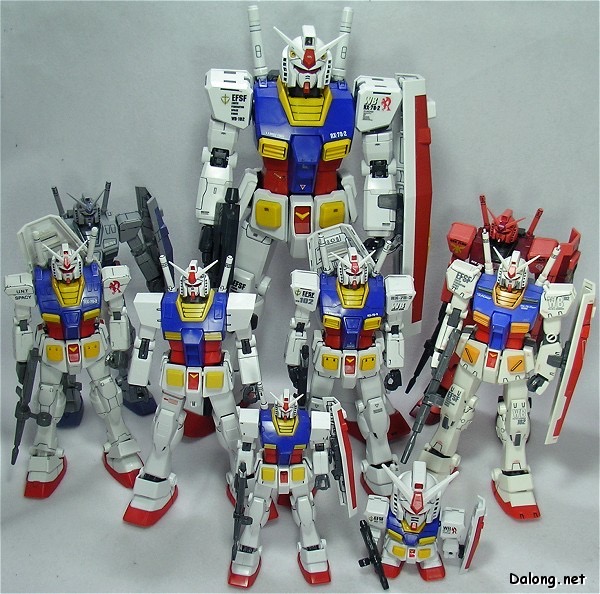
Included above: all major scales of Gundam kits. Front to back: SD and 1/144, 1/100, 1/60.
So, the best thing to start with is what kind of model kit you want to build. Does that Hello Kitty crossover Gundam kit catch your eye, or are you wanting to make a super-serious war mech?
Super Deformed (or SD for short) kits are pretty common and fairly inexpensive. As such, they almost make the perfect beginner model kit. These are found with a variety of designs and line names.
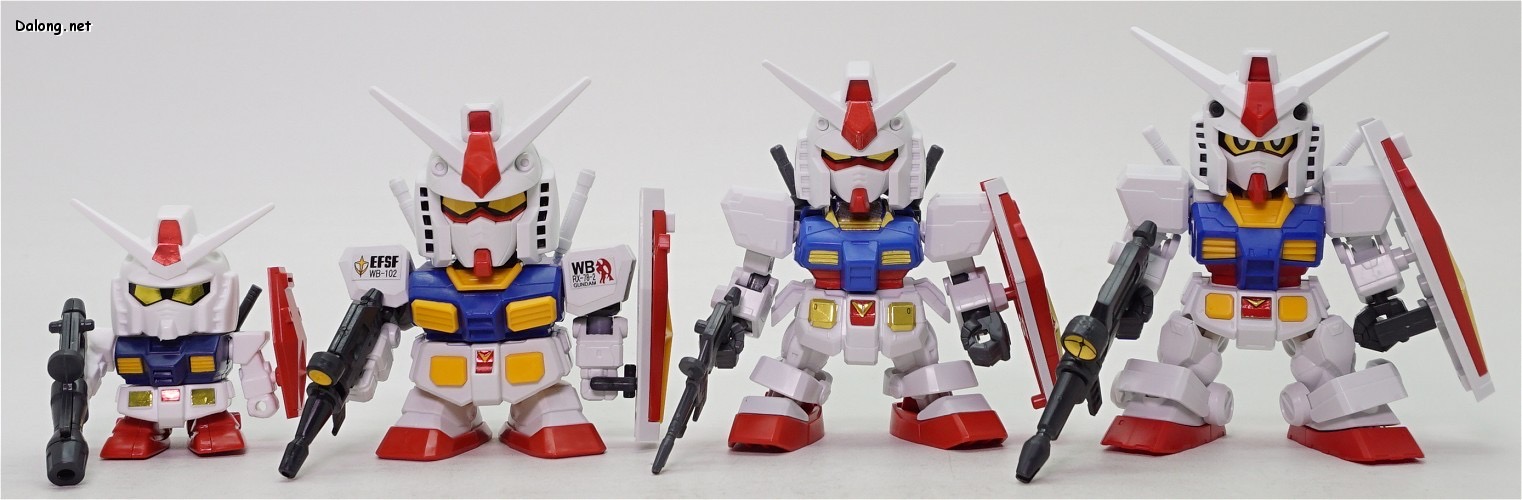
Left to right: SD, BB, SD-EX, SDCS. All are of the RX-78-2 Gundam.
The current style is SDCS (Super Deformed Cross Silhouette), which allows for a builder choice between cutely tiny and a more proportioned kit with knees and elbows. Older kits in this style are even simpler and have a charm all their own about them.
Jumping up, there is the High Grade (or HG) kit. These are scaled in proportion to the giant pretend robot on-screen and are all 1/144 the size the show says it is. This can make some wildly different sizes for the kits themselves, but they all tend to be the same quality of build overall. The average size is often around 4 to 5 inches high.
From left to right: PEN-01B Momokapool and the pilot unit, PMX-003 The O, and RX-78-2US American-Type Gundam. These are all literally their proper sizes, at 1/144th scale.
You can often find sticker sets that add detail to these kits, but they are also often fairly well detailed without them. Some 1/144 scale kits lack the HG marker but are labeled Entry Grade instead. These are slightly simpler, but much more color accurate and have fewer needs.
There are also the Real Grade (or RG) kits at the 1/144 level. These are insanely detailed, with full internal skeletons, incredible detail, tons of stickers, and really tiny fiddly bits. They look amazing but are also not recommended for beginners or those wishing to build casually.

NOTE: edit these together
Real Grade 1/144 RX-78-2 Gundam
Going larger, the Master Grade line runs at a 1/100 scale. These kits tend to be larger, often have their own internal skeletons, and will either be hyper-detailed or designed to be reasonably cartoon-accurate. Sometimes both. These kits tend to focus on the more popular units of a show, with more obscure units staying at the 1/144 scale unless they can make it on the cheap.
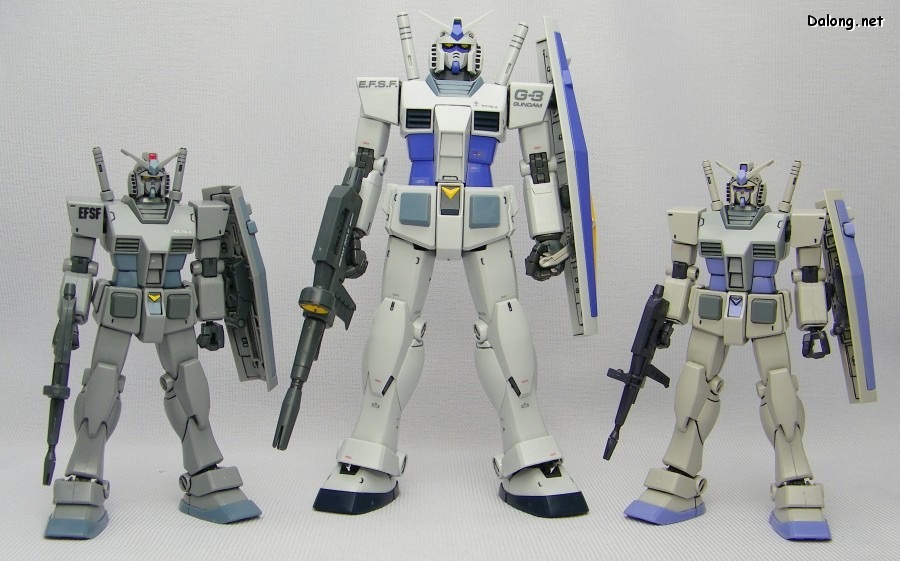
Master Grade RX-78-3 G3 Gundam. Pair of 1/144 High-Grade versions for scale.
There are also some other kits made at the 1/100 scale, such as the Re/100 scale for more obscure robot designs. This allowed Bandai to make a fan-beloved design with the armor detail of a Master Grade kit, but also avoid the expensive internal armor frame. Older shows also had plain 1/100 model kits that are similar in quality to the Re/100 line as well.
Finally, there’s the 1/60 scale. Called Perfect Grade (or PG), these are the Hilton of model kits. Running for hundreds of dollars and sold in boxes that could house a small child, you are in for a long and fulfilling build. If your patience can keep up. The end result kit tends to be around 3 feet tall, and only the most popular units tend to show up in this scale.
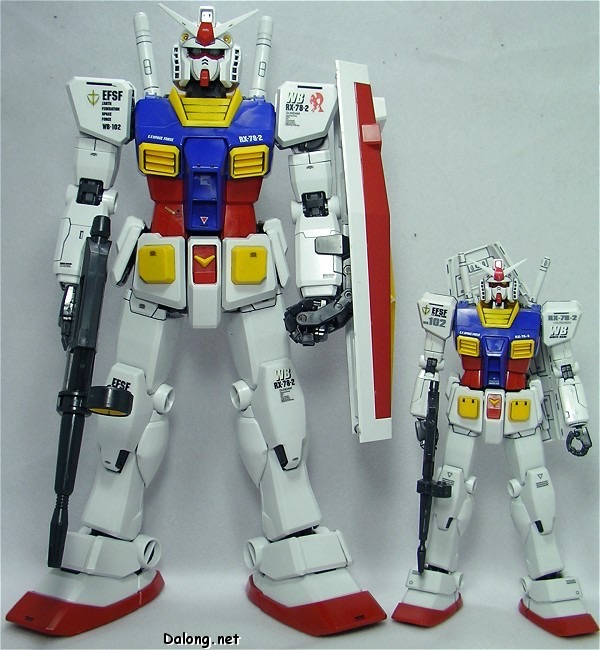
Left to right: Perfect Grade RX-78-2, Master Grade RX-78-2. These guys are massive.
There are a few other scales, like 1/220 (seen briefly in the 80s) and 1/48 (or Mega Grade). These are few and far between and are usually done for marketing reasons. Speaking of, there were also rare 1/60 kits made for the main character robot from shows produced in the 90s, and are like larger versions of their 1/100 iterations made at the time. These are oddballs and can be worth tracking down if you want a weird standout piece in your collection.
Once you’ve got your kit, be it from your local hobby shop or delivered from Japan itself, it’s time to open the sucker up. You will see many different chunks, all sealed in individual plastic bags. As wasteful as it is, this also prevents the plastic from rubbing against itself before you can assemble it into a faux-metal Warrior.

Kit shown: 1/144 High-Grade MSZ-006 Zeta Gundam. Hobby Search Japan is the source for this image, and they keep extensive documentation of the products you can order.
This is nowhere near the amount of plastic you’ll find inside the box, but it holds everything you can expect to see. The ornate plastic with long pipes bending all over is called a Runner. This is a run of plastic injected into a mold that has all of the parts you will need to make your robot. The bright green is something you will also often see: translucent or clear plastic. This is used for things like beam sabers, eyepieces, and other decorative pieces of awesome flair.
Also, stickers. Making multiple colors of plastic can be pricey, especially in smaller scales. As such, Bandai will use stickers to slip in extra colors without making more pieces. These can be replaced with paint, should you choose to go that route.
Once you have your kit unpacked, you will need some supplies. Here is the selection I use myself.
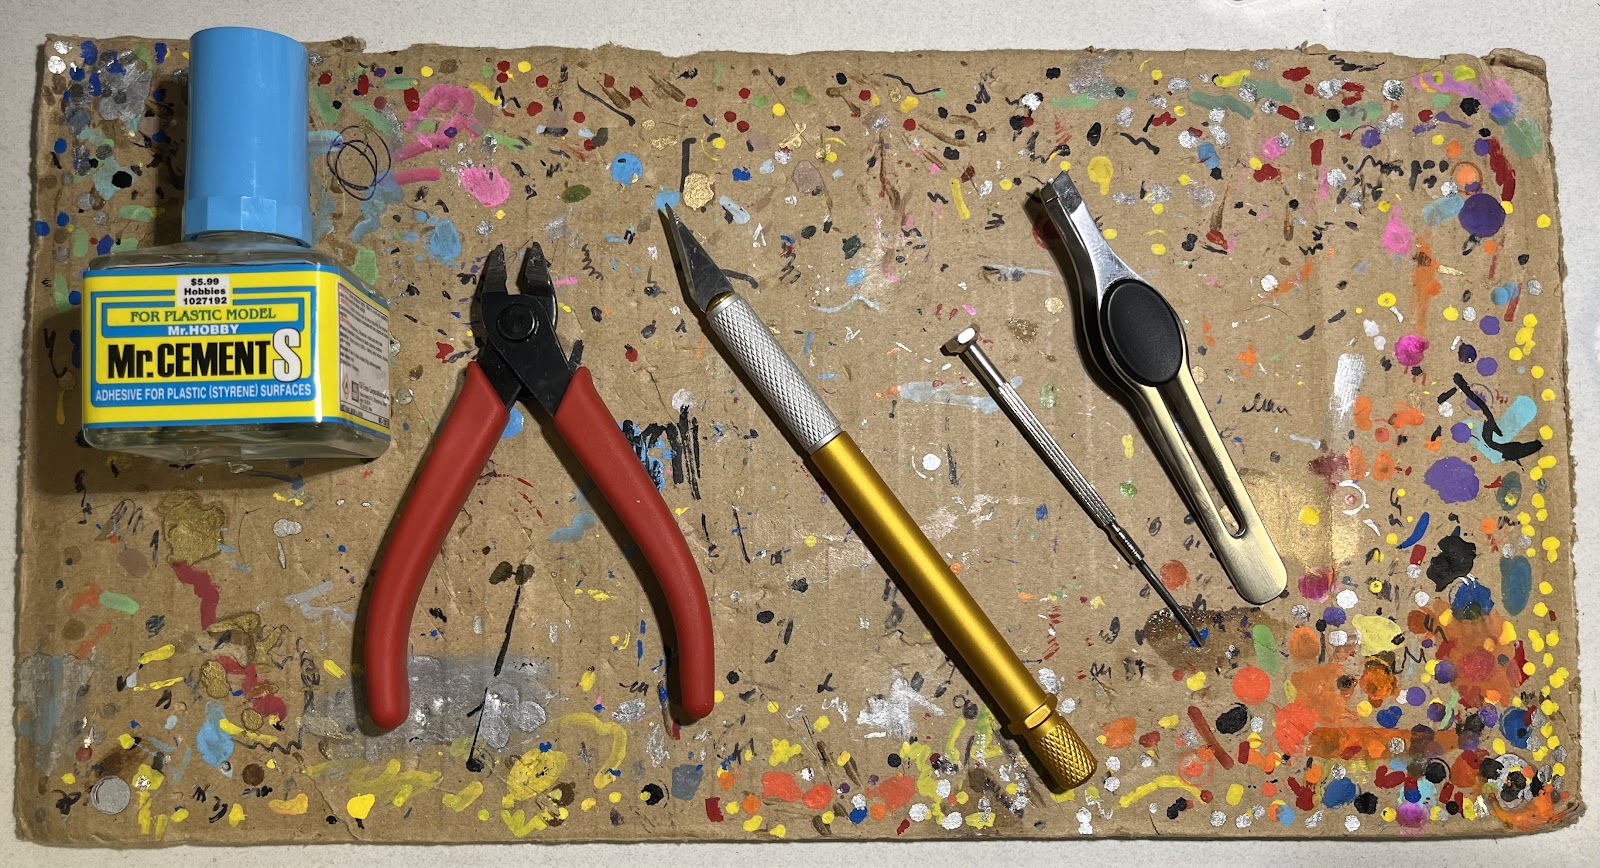
Left to right: Mr. Cement S glue, hobby snippers, hobby knife, small screwdriver, tweezers.
The Mr. Cement S is a liquid glue that is easy to apply with the cap-mounted brush. I like to use this to ensure smaller parts that shouldn’t be moving or coming off remain attached. You can easily substitute this with any kind of superglue if your local hobby store doesn’t carry a similar glue. Just make sure to be careful, as it’s also easy to use too much glue. I don’t recommend beginners do this, but I’ve been doing these kits for almost two decades by now.
Oh God, I’m old.
The Hobby Snippers are often inexpensive, with this model costing $8 at Target of all places. They’re the same as wire cutters, should you have them around home, and are used to snip the pieces away from the plastic runners. Before I obtained these, I actually used a pair of nail clippers, which did the job halfway well. My first kit? A pair of scissors. Really stupid, but it worked!
The Hobby Knife, or Exacto Knife, is another cheap piece of kit. I use this to trim any remaining piece of the runner on the piece, getting it as close as possible to the part itself. It can also be used for those crazy enough to cause battle damage to their kits.
The small screwdriver isn’t necessary at all, but I love using it to pull stickers off the sheet and applying it to the parts. You could always use the hobby snippers, nail clippers, or hobby knife to actually do this, but this small guy is what I like.
Tweezers are about as necessary as a screen door on a battleship. I’ve got larger fingers with stubby tips, and tweezers can be great for holding incredibly small pieces for placement or painting. These can also be used to place stickers as well.
The cardboard chunk is just to place painted pieces on, should I choose to paint. It also helps keep my desk from getting cut up when I use my hobby knife.
You don’t need all of these, of course, and this is just what I like to use for my kits.
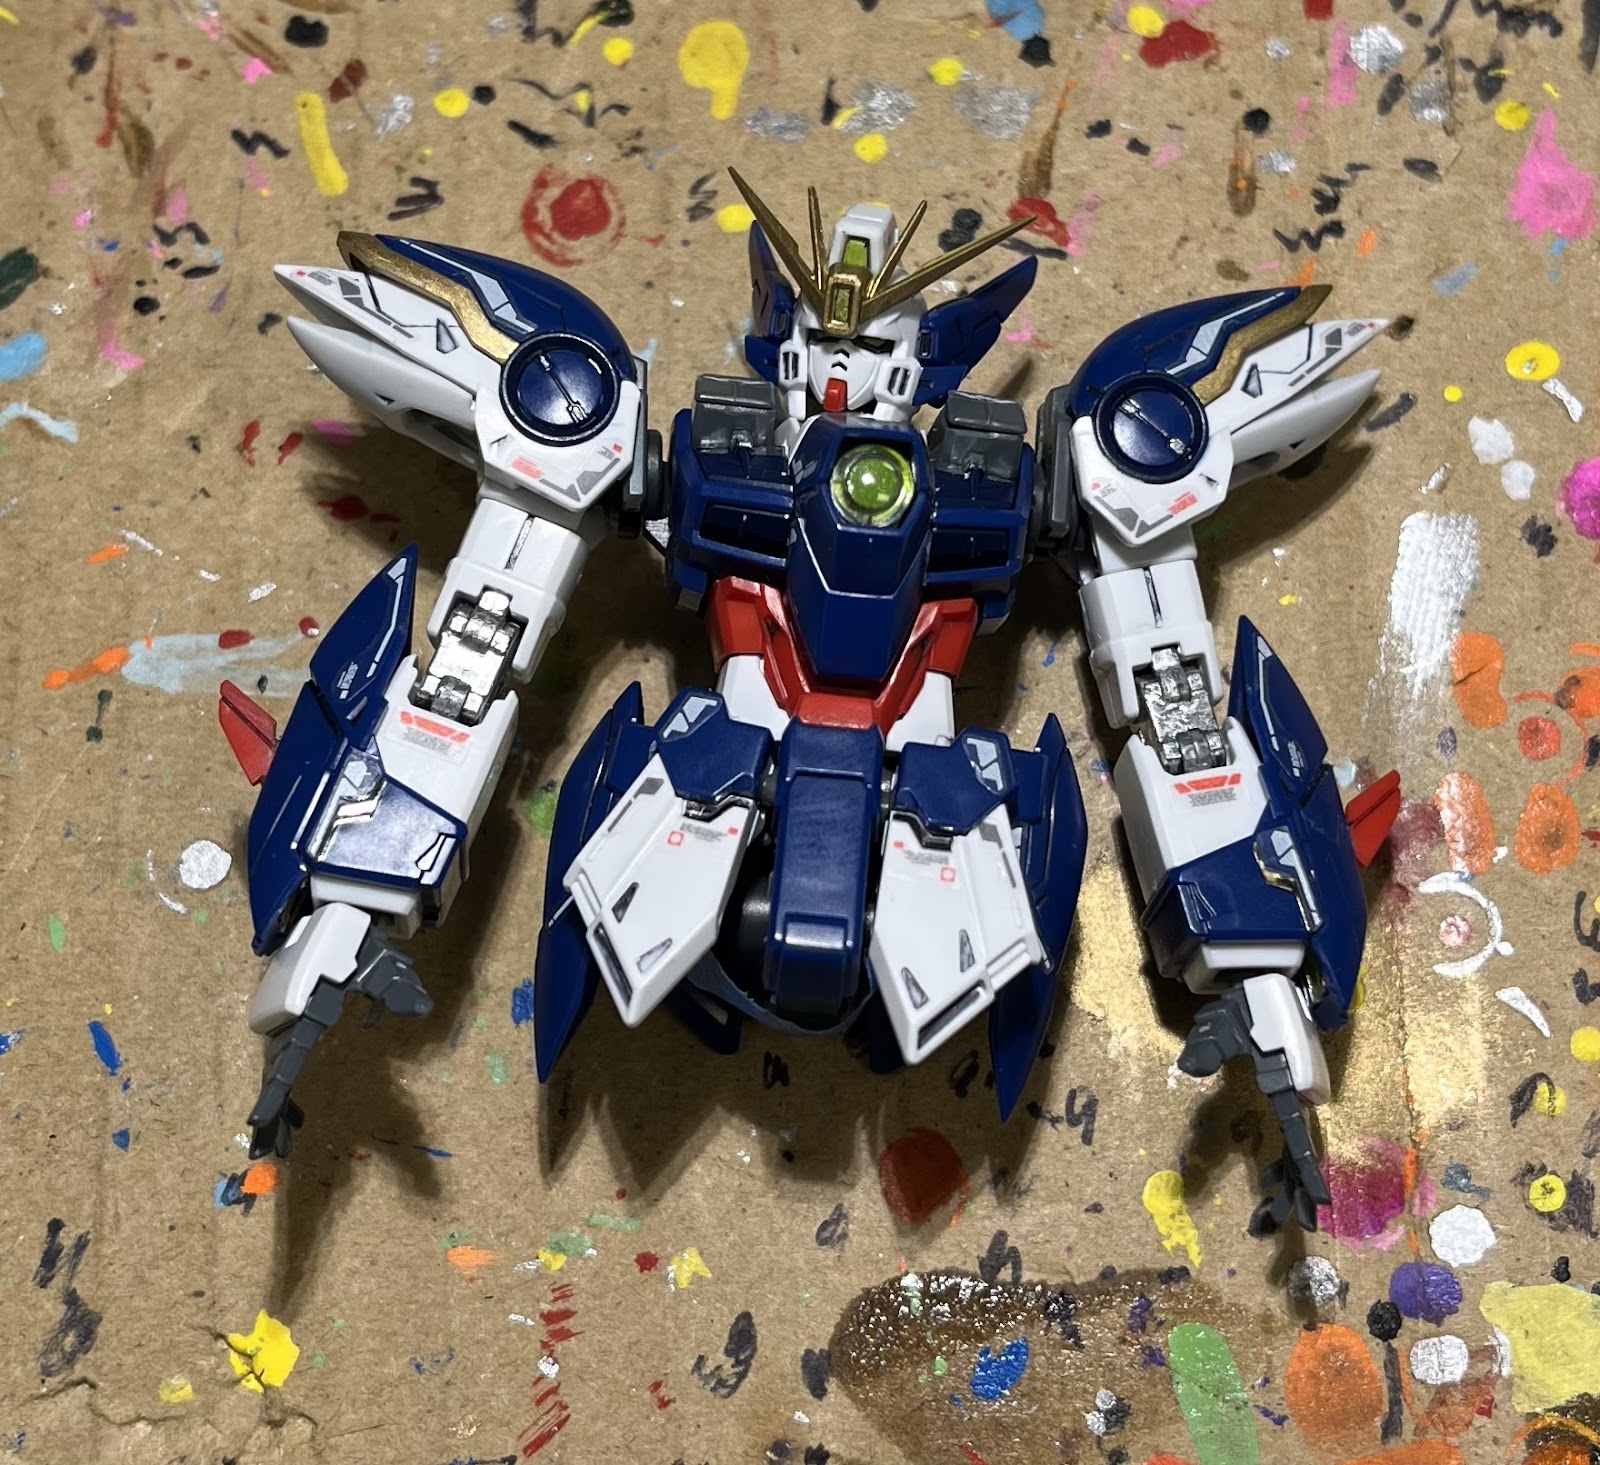
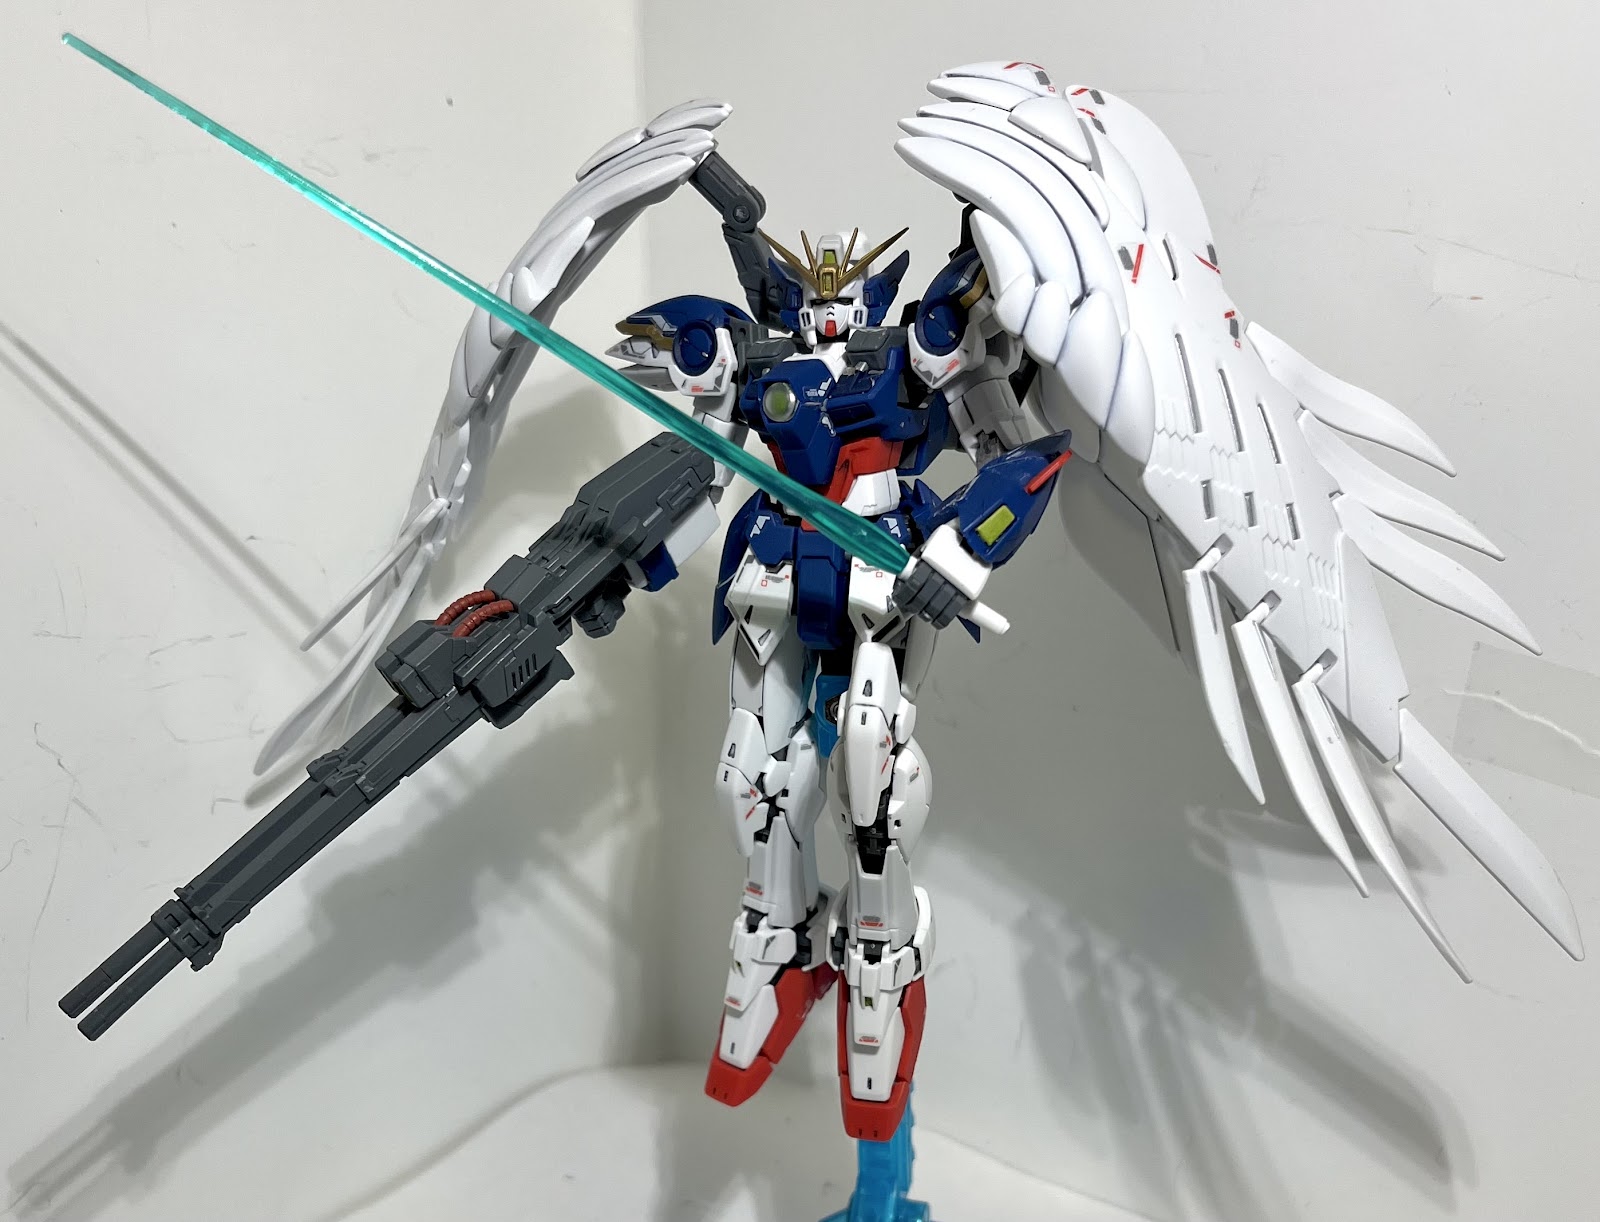
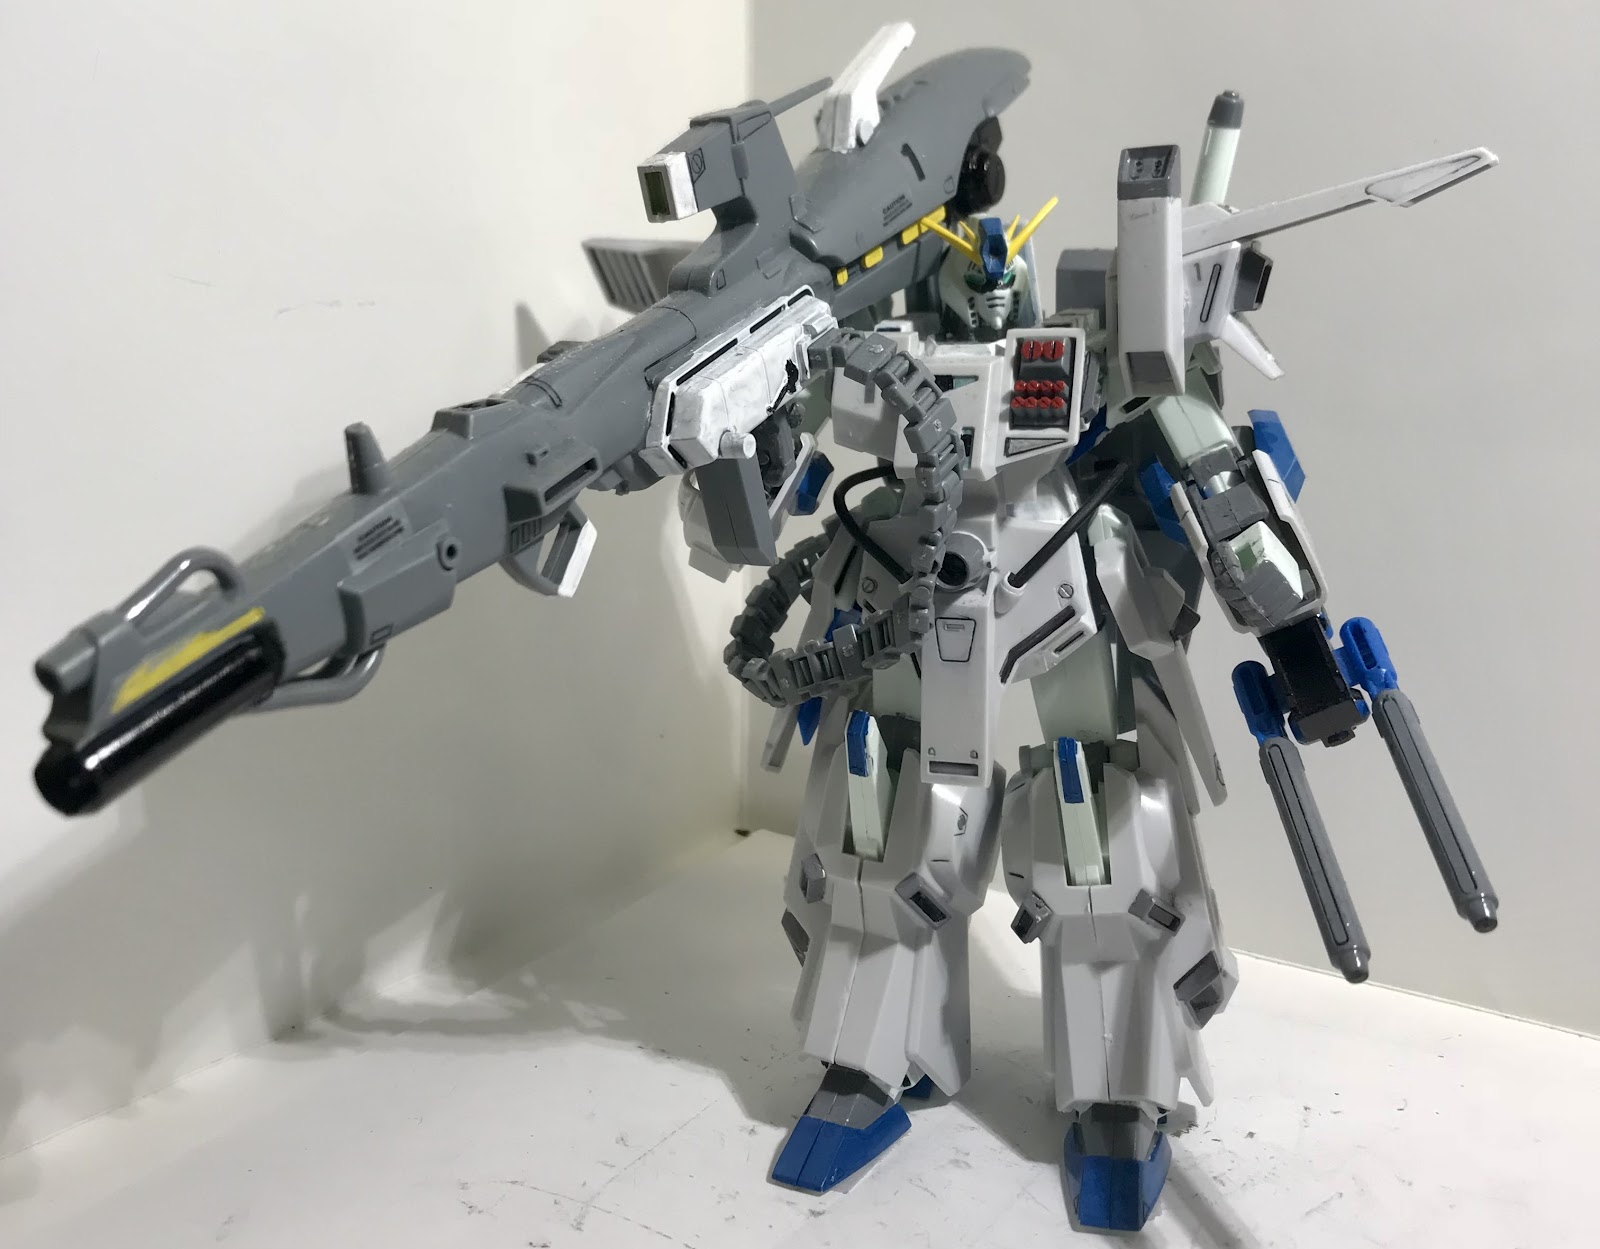
Now, we’re going to be building a model kit for the rest of this guide. Because I am utterly terrible at planning these things ahead, my sample kit is a Real Grade XXXG-00G0 Wing Zero Custom. I love the design, and it was on sale for 40% off both excellent reasons to pick it up.

Included with each Gunpla kit is an instruction sheet. The more complicated the model, the longer the instructions will be. I’ve heard the instructions for Perfect Grade kits could be used as a bludgeoning weapon in a pinch. Luckily, the instructions are similar to LEGO instructions. Each part is found on a corresponding letter runner, and is numbered appropriately.
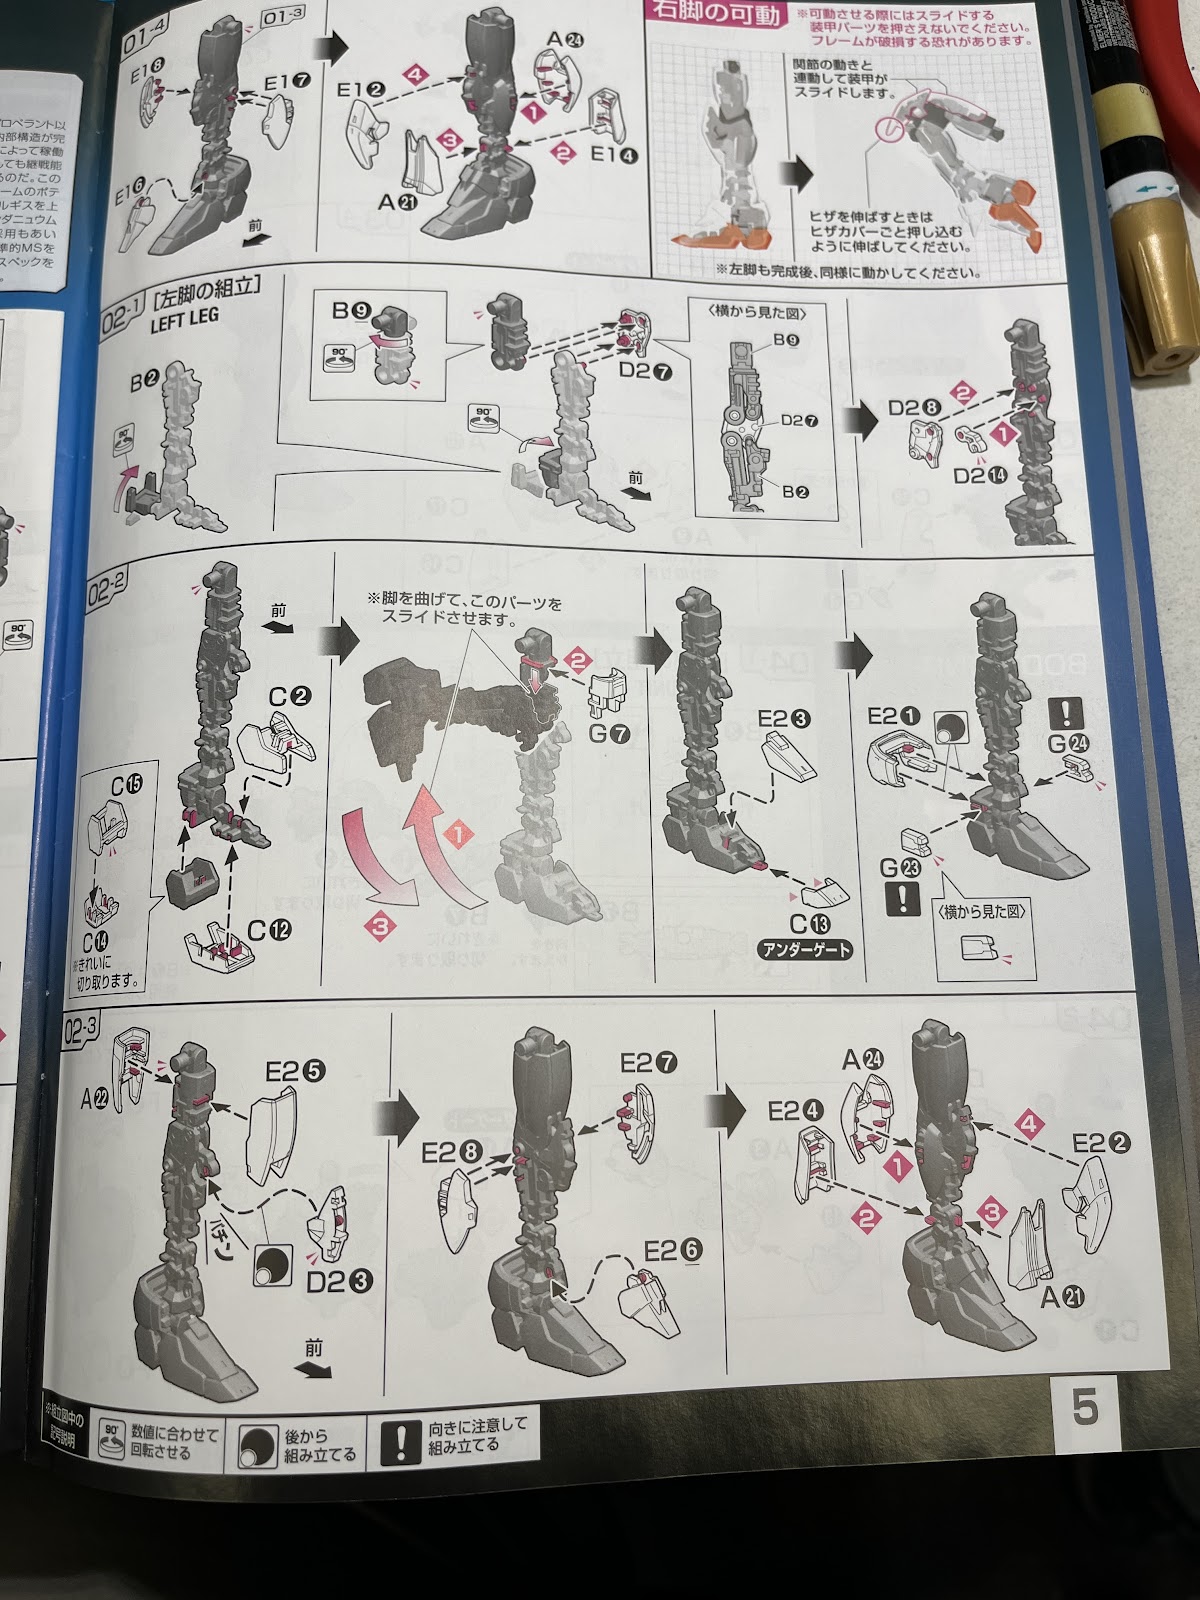
This is page 2. They often begin with the head or the legs. This one chose the legs.
If your step calls for part A 10, look for runner sheet A and snip out part 10. Recent instructions may have English translations included, but even the Japanese-only instructions of ages ago are still comprehensible without knowing the language.
Luckily, you can also start with whatever you want to start with. Limbs, torso, and accessories are all done in separate segments. I like to start with the hips, which mount well on most stand accessories. This way, I can add on to the kit without worrying about it laying somewhere weird.
Since the Real Grade kits are remarkably fiddly and filled with small pieces, I’m going to show you a starter set of steps: how to go from runner to a completed foot.
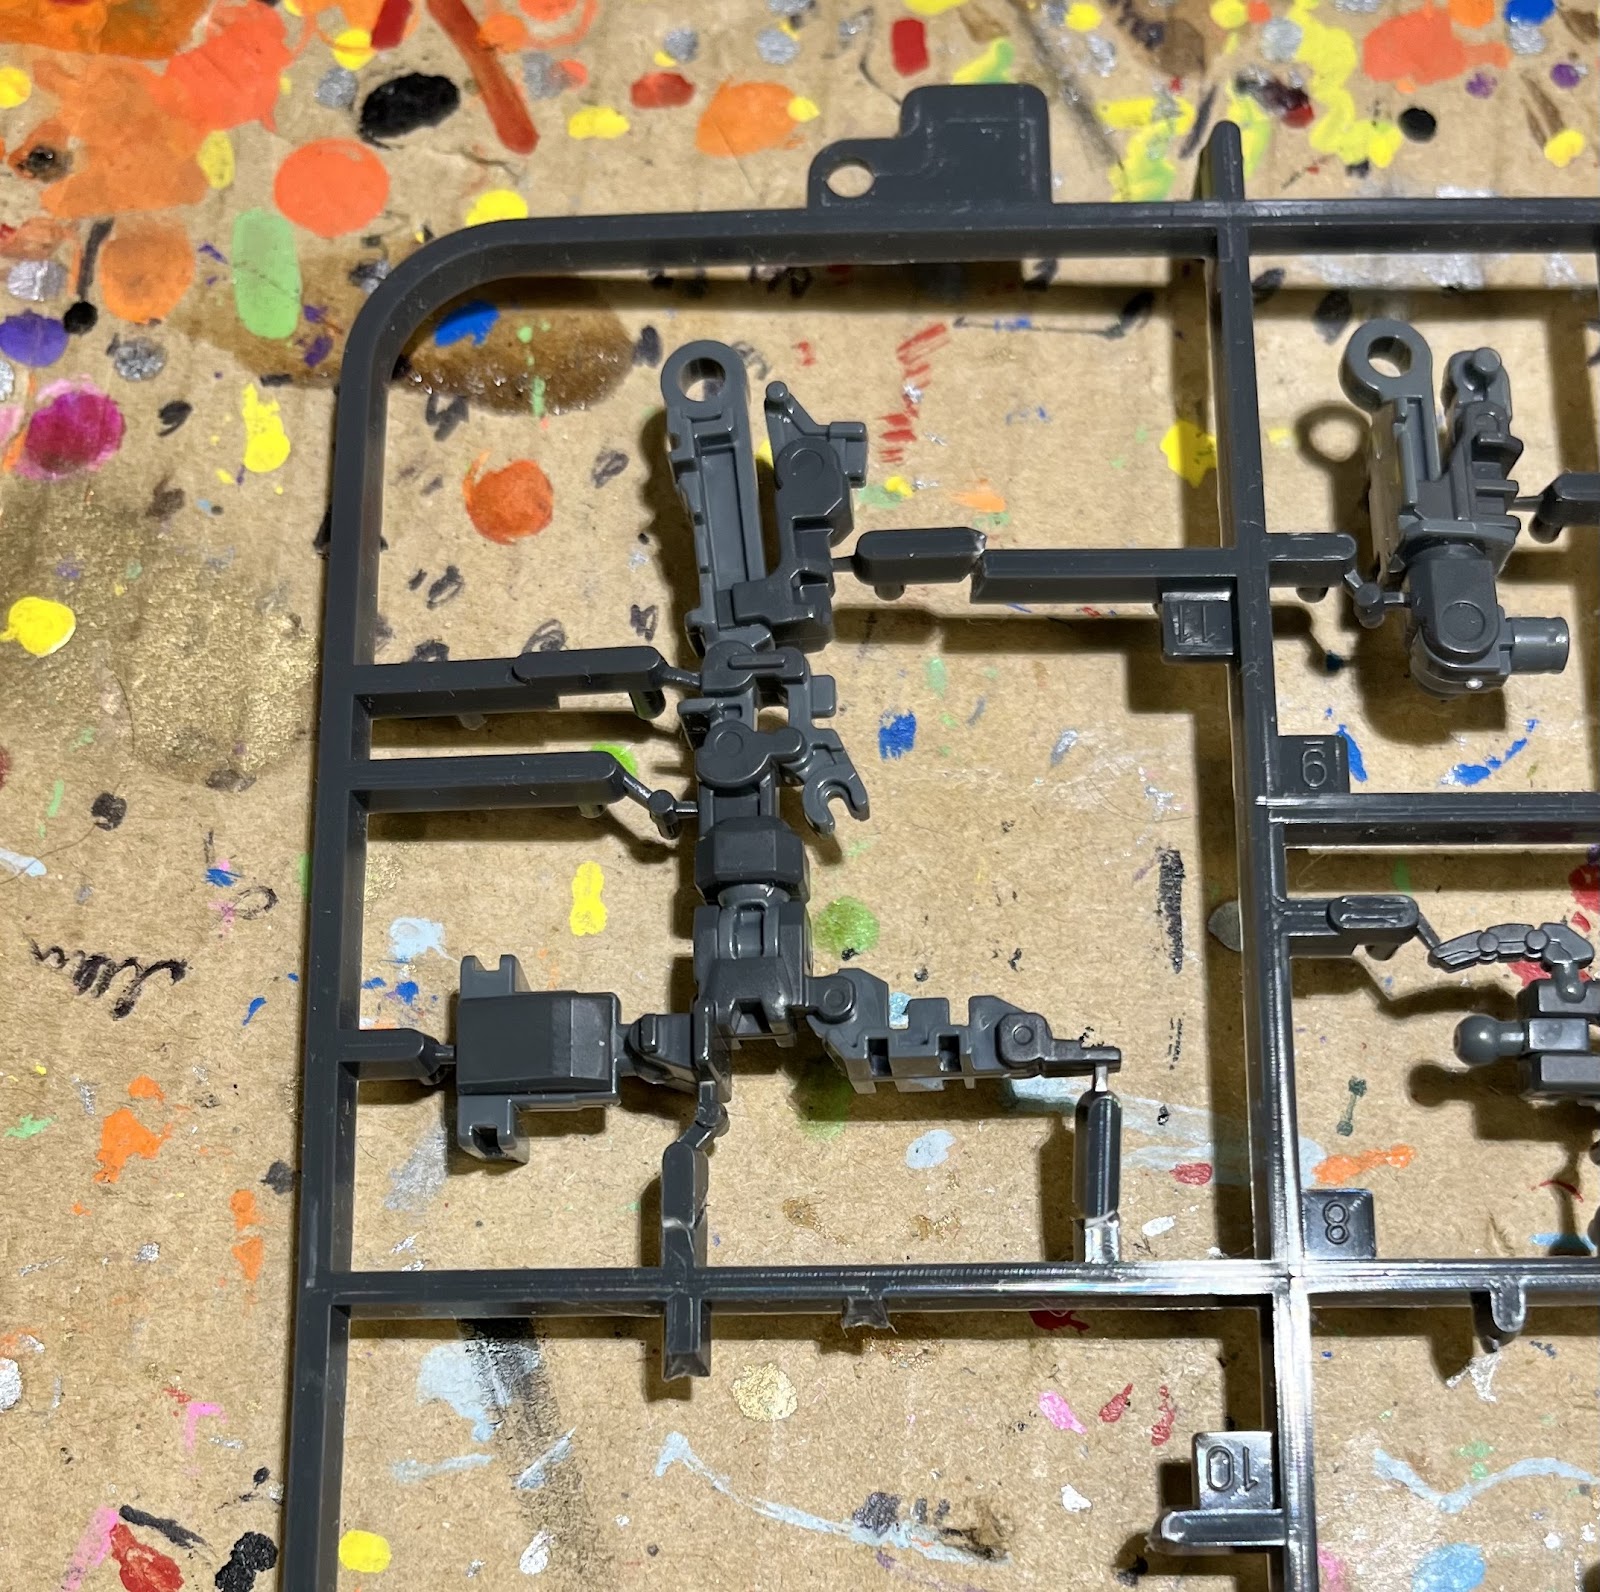
With Real Grades and their internal skeletons, snipping out what makes the inside of the part is key. Most kits without the inner frame will feature joint pieces made out of softer plastic instead. So, let’s carefully skip this guy out. I strongly recommend skipping out these kinds of pieces far away from the piece itself, as a mistake with an inner frame is harder to patch up.
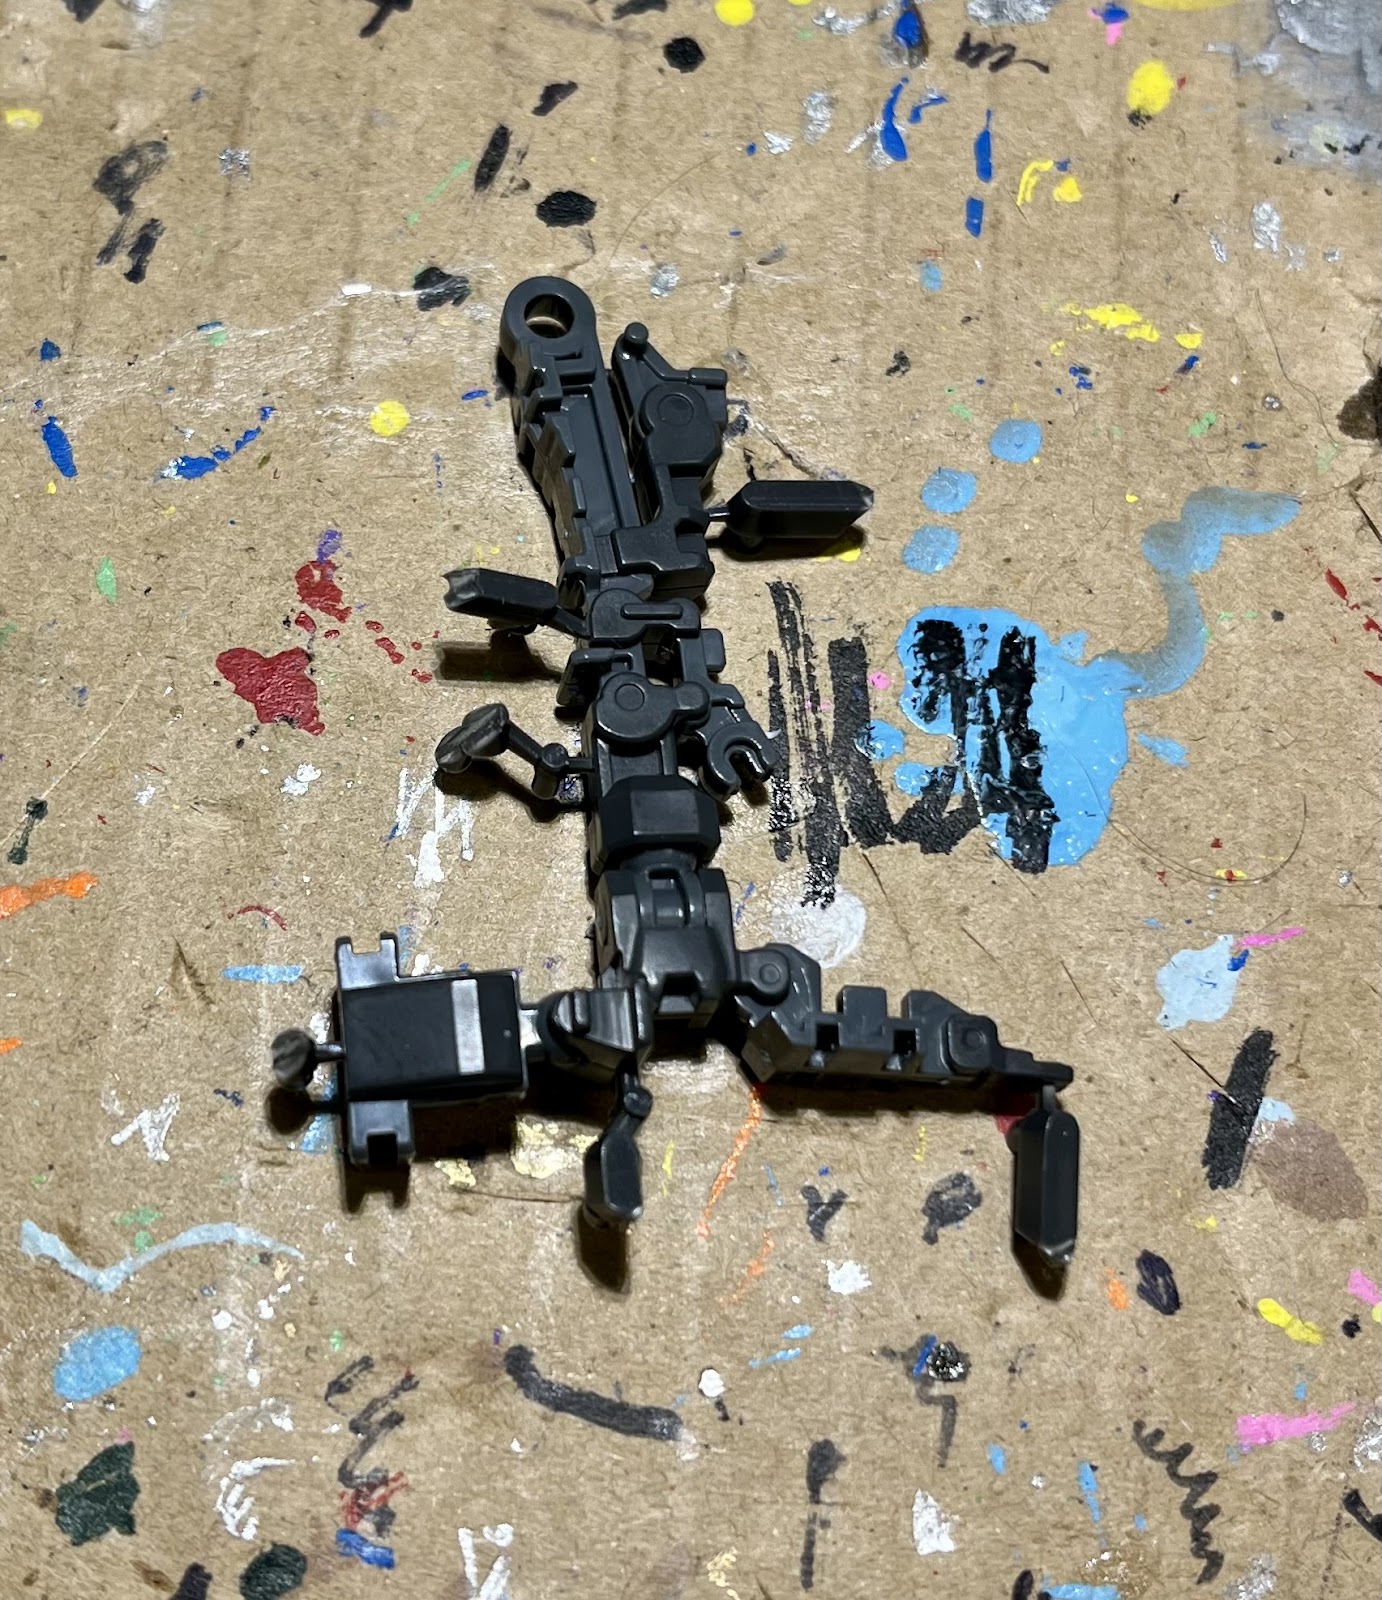
Done. It’s a little ugly, but it cleans up well. Pieces like this will also often involve movement of portions to make it right. In this case, I also have to rotate part of the ankle, as you see below:
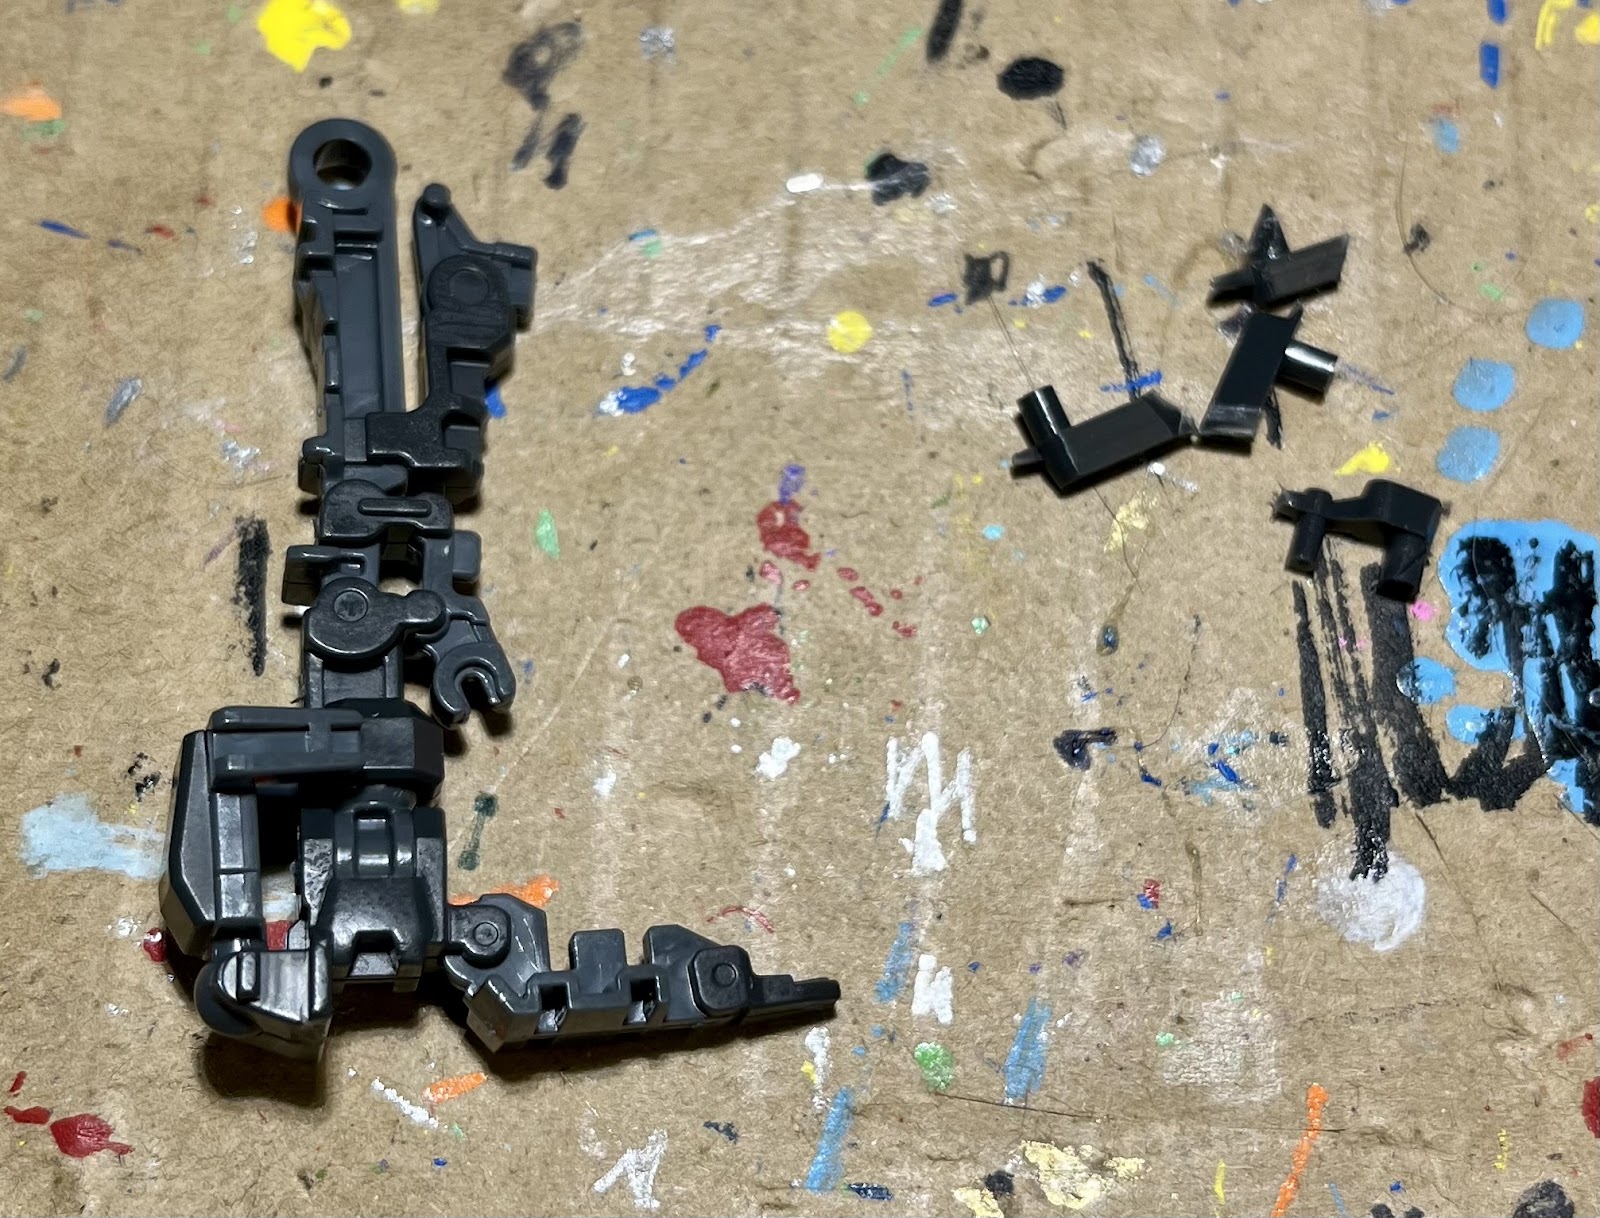
The excess plastic can be tossed. Or saved for weird art projects. Now, let’s grab the pieces for the next step from their frames…

Perfect, part of the foot. And now to assemble…
And to add the remaining pieces!
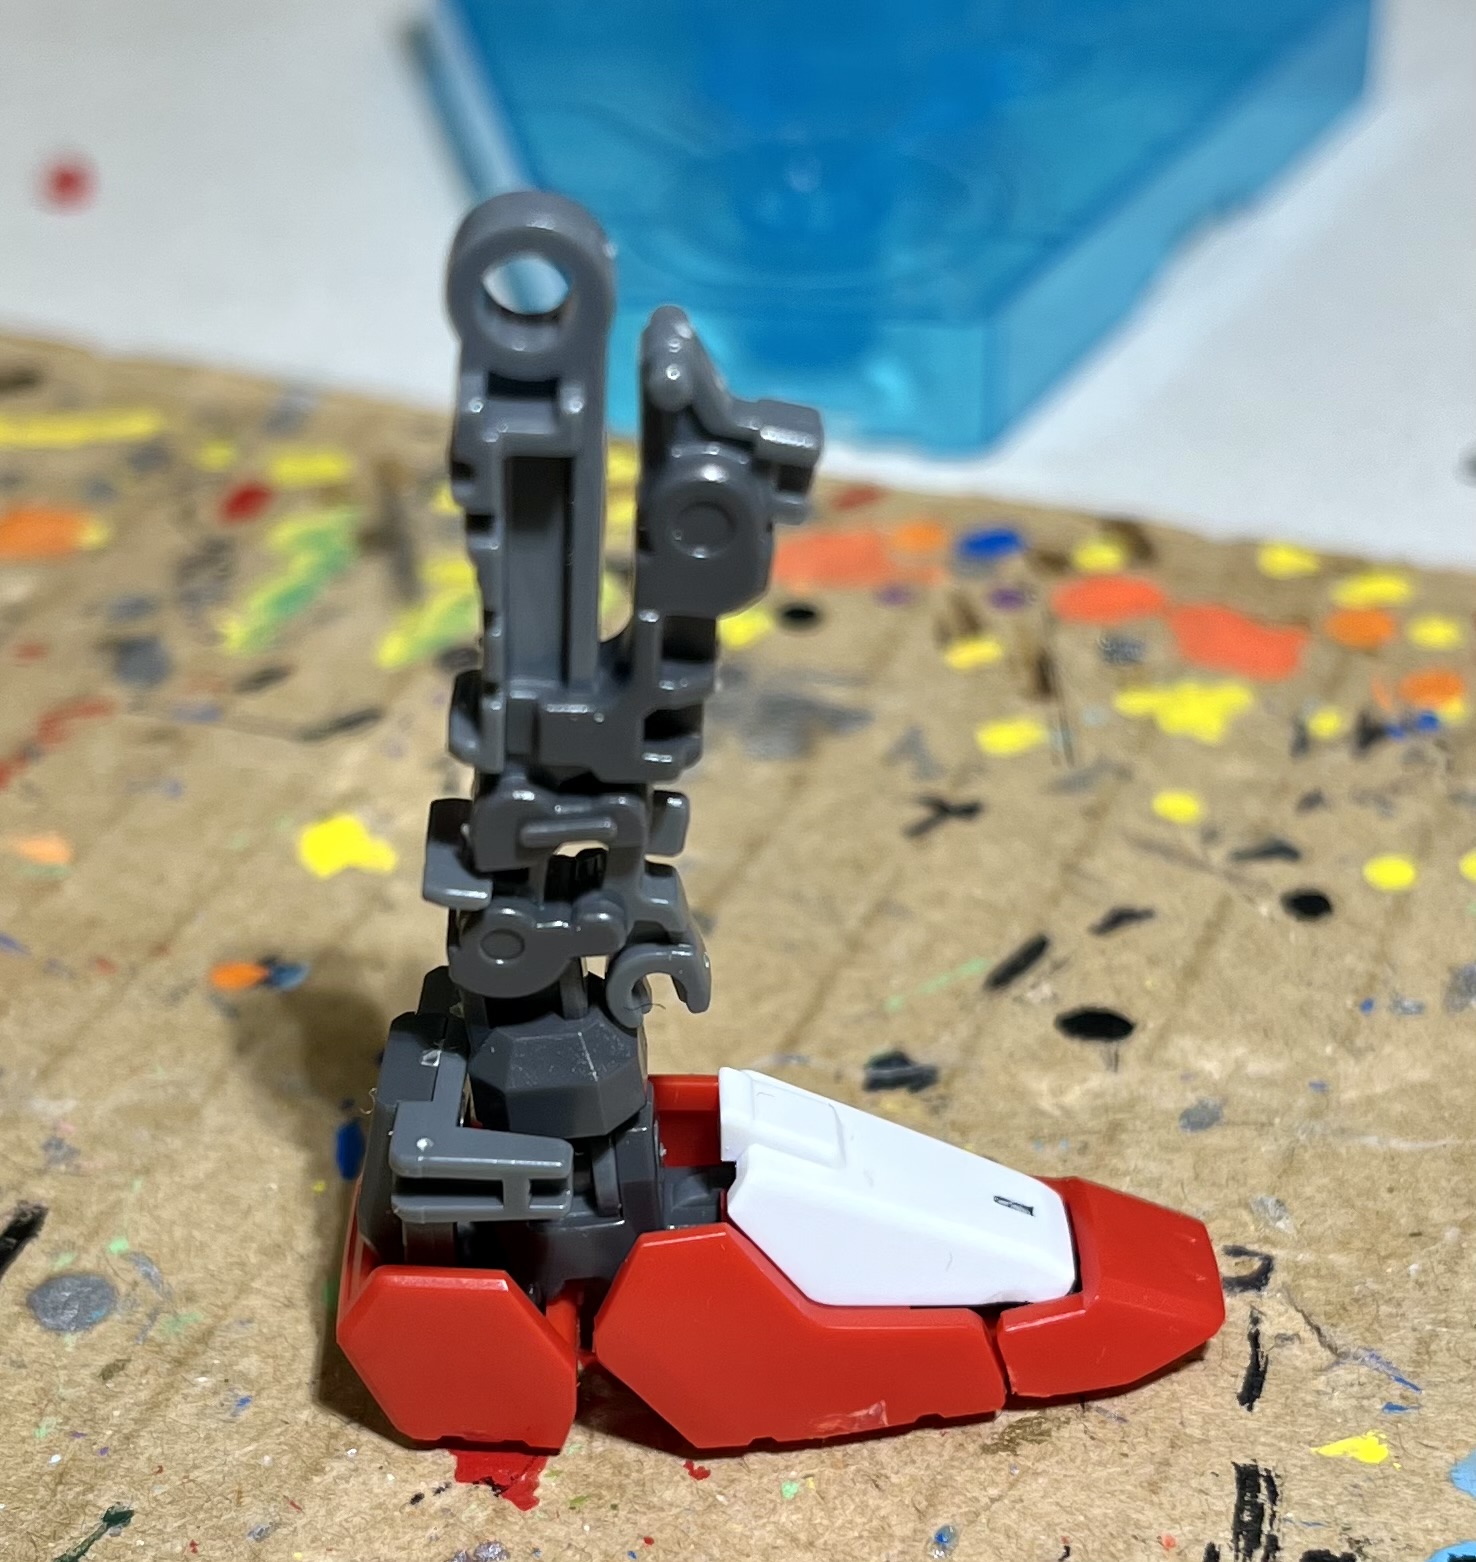
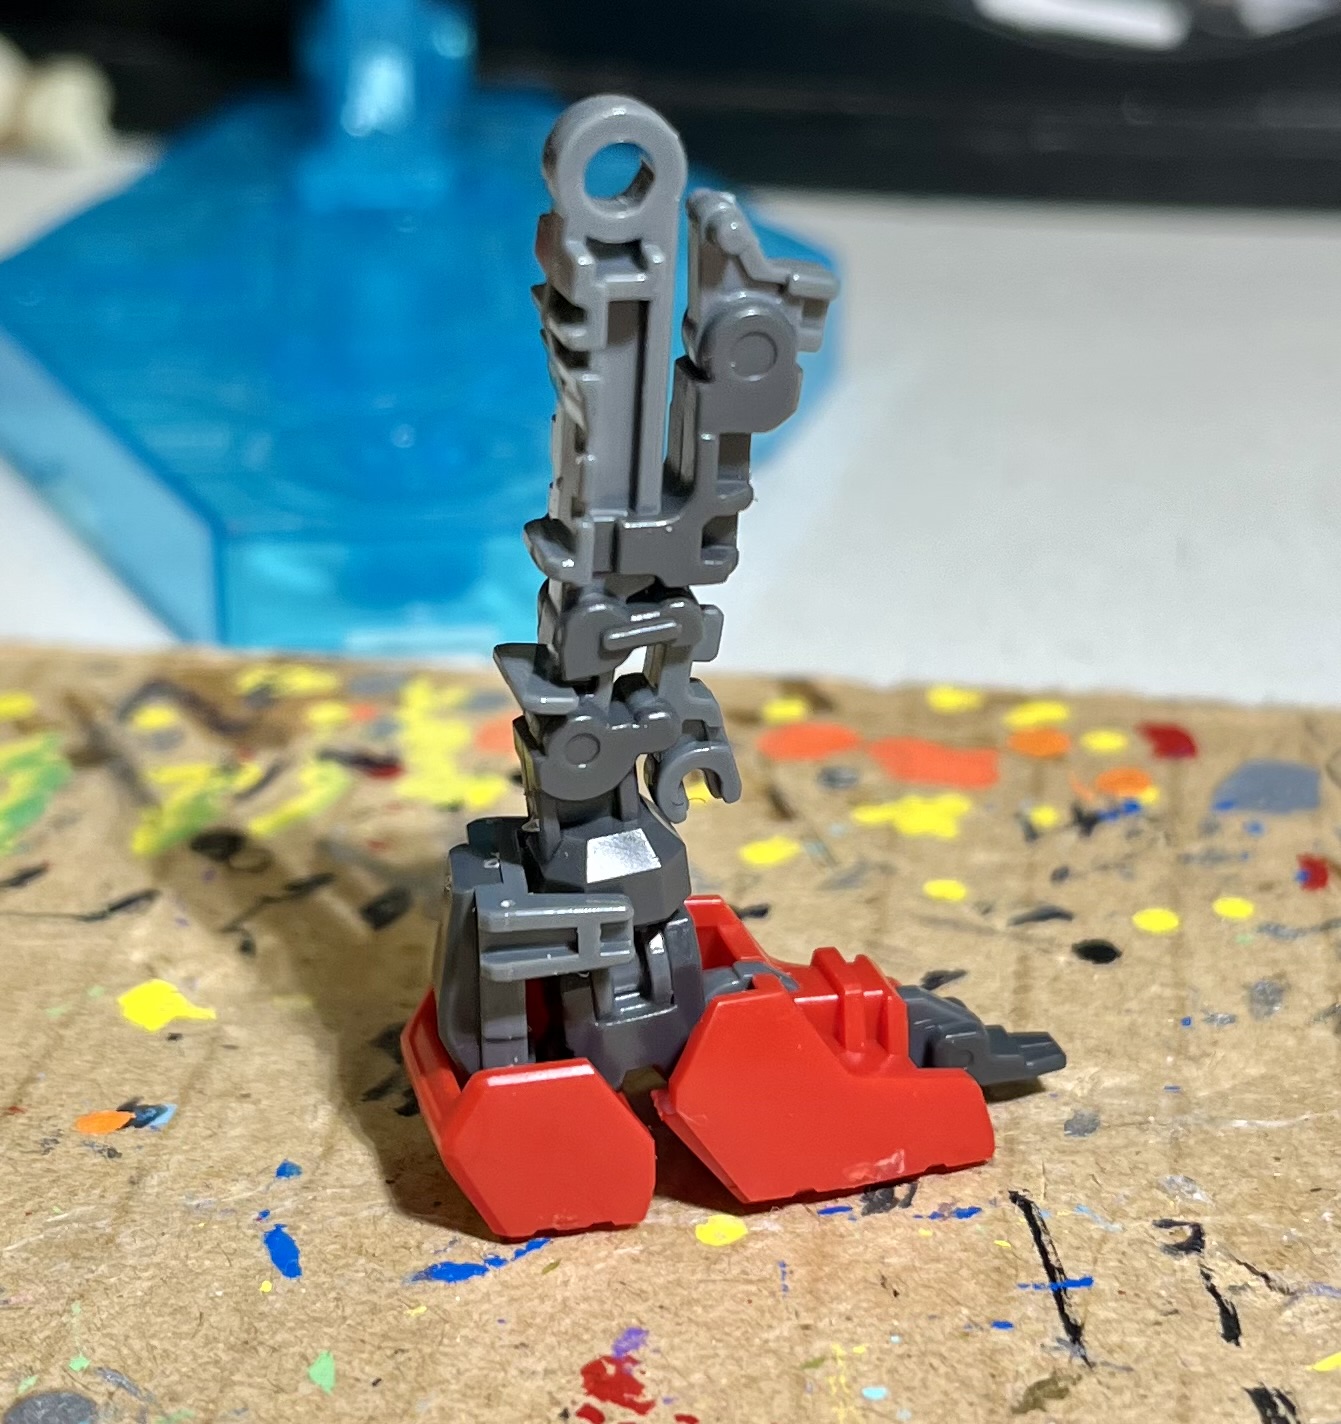
Excellent. I did use two dabs of glue to keep the tip of the toe on the foot, and the heel on the back of the foot. However, this will allow the rest of the foot to move properly and not shed armor. These steps are all parts of the instructions, and take up a chunk of the page. Simply repeat the general steps, and you will eventually have a small plastic robot in front of you.
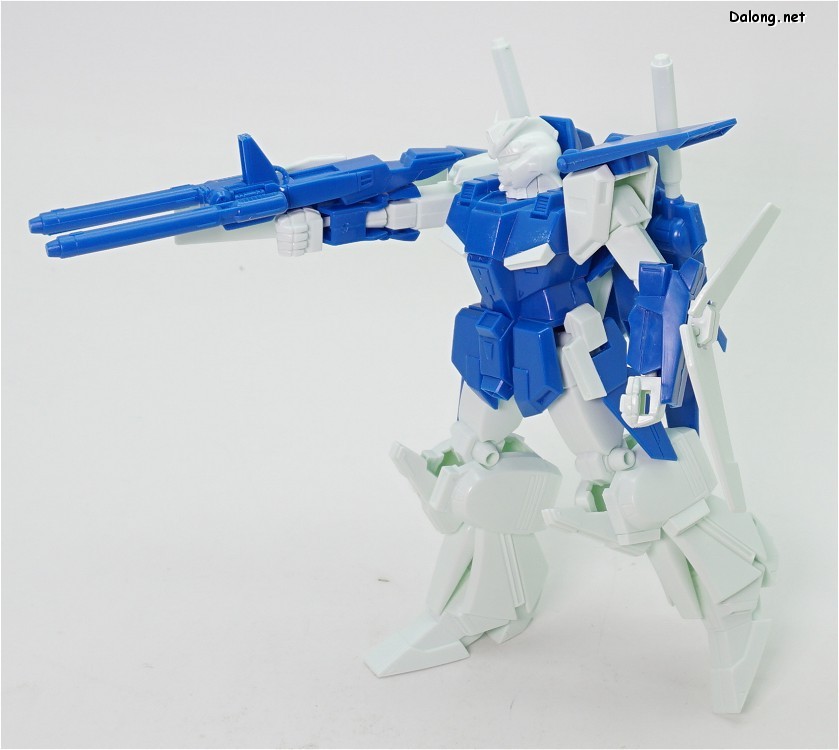
Now, as you assemble your kit, you will need to decide on a few important things. Do you want to detail out your kit? Do you want to use the included stickers, or would you rather paint them? Or neither? These are important to think about, as they can change the appearance of the kit. For example, here is an arm of our Wing Zero Custom without detailing, compared to an arm with.
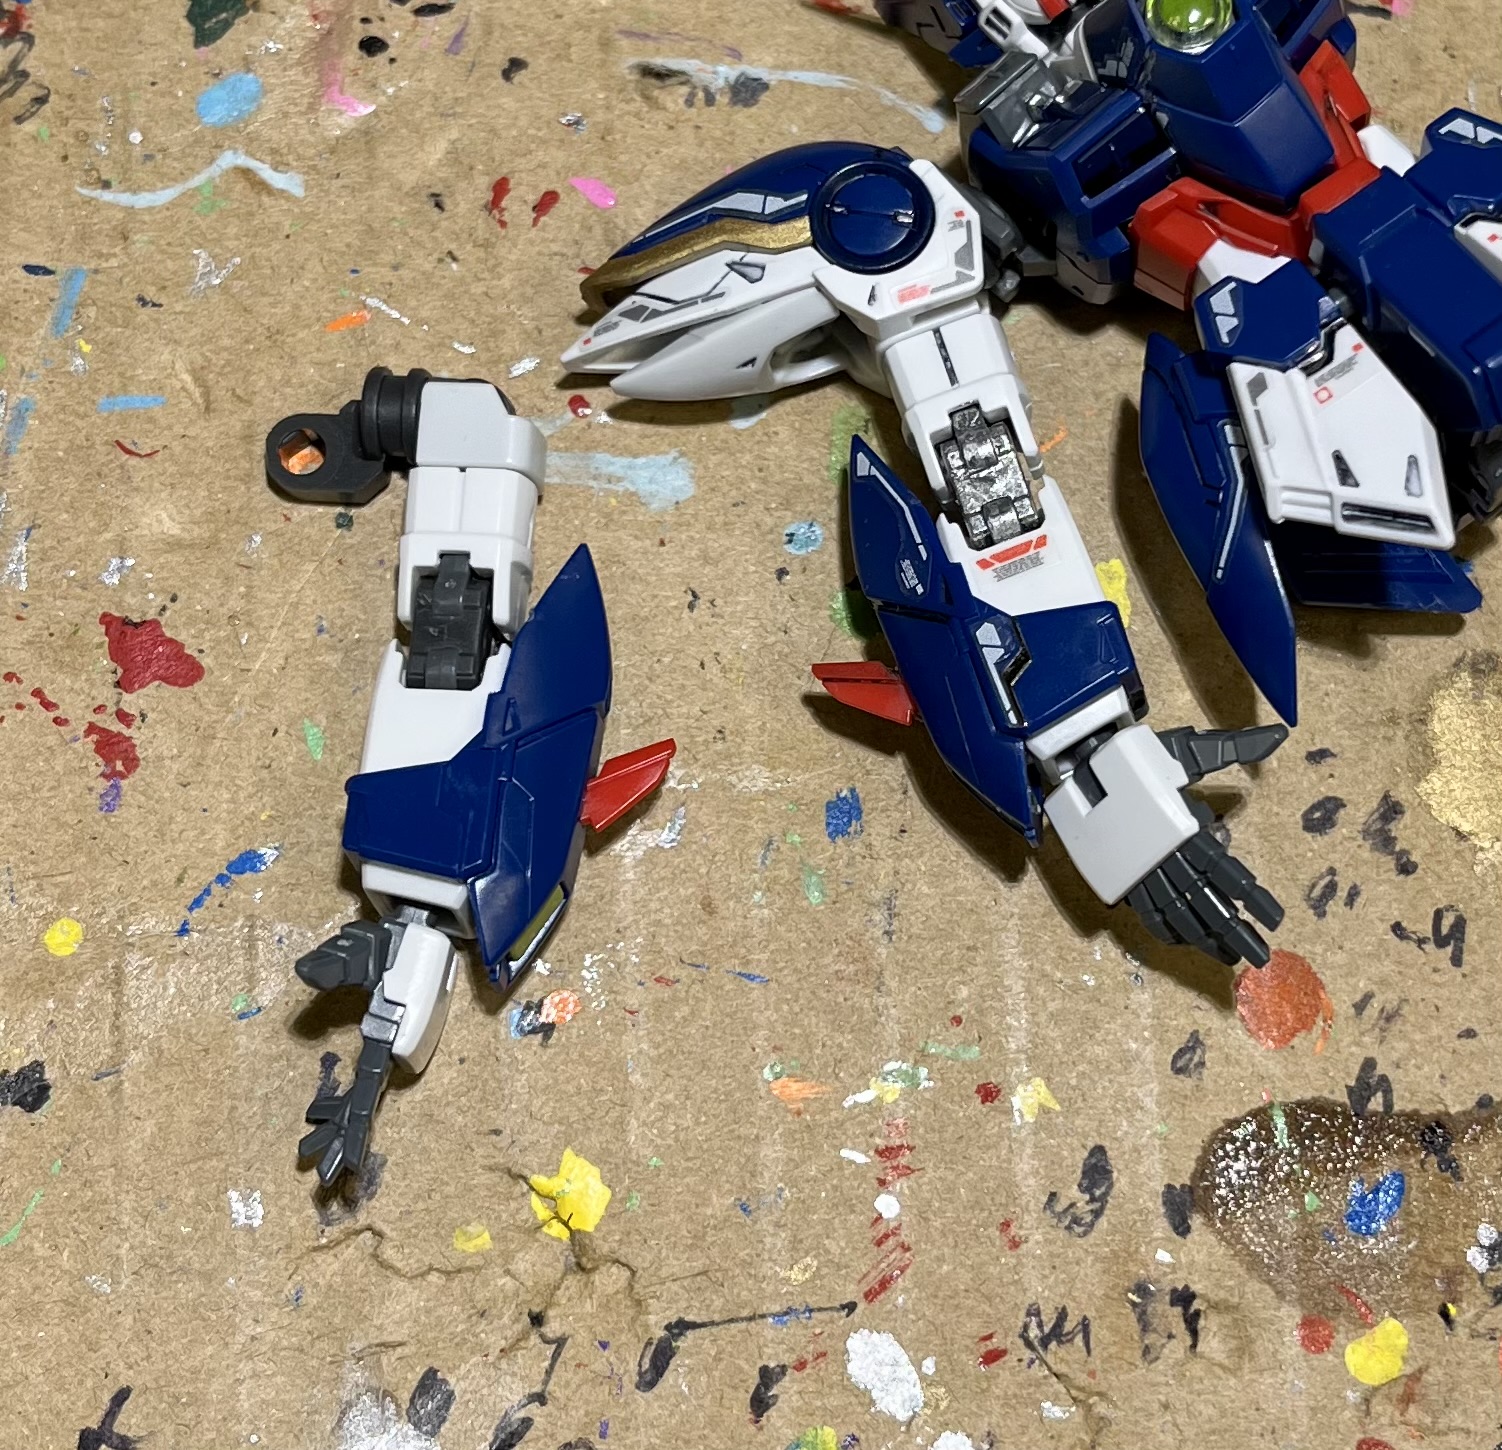
While it does not make for a massive difference, the stickers make the solid blue stand out a little with some white and silver. The elbow joint was painted with some liquid chrome by myself. And that also adds a different feel entirely. Adding the single dark line on the upper arm where the detailing exists also gives the illusion of metal panels rather than chunks of plastic.
Of course, you are perfectly valid to not do these. One of my friends has chosen to do no detailing whatsoever, and his kits also look great. These are the options I’ve come across in my time:
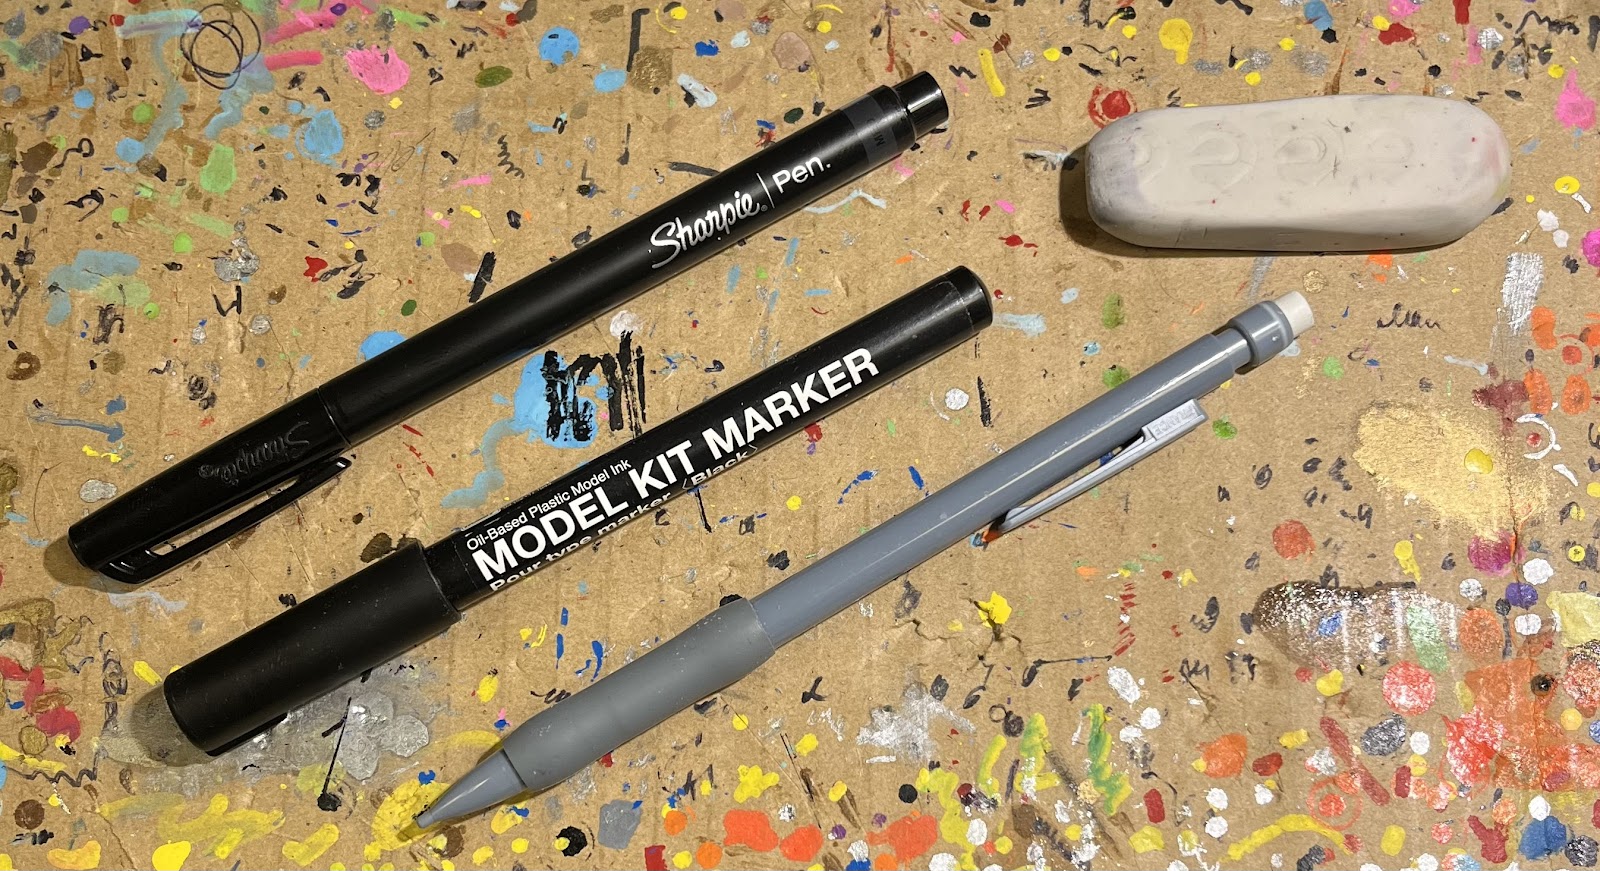
Left to right: Sharpie Pen, Model Kit Marker, Mechanical Pencil, Eraser.
The Sharpie pen is a felt-tip ink pen that is not the permanent kind. As it dries, you can rub off much of the excess ink with a finger or a tissue or cotton swab. Any residue can be erased with a literal pencil eraser, or left on for weathering effects.
The model kit marker is a similar product from Japan, but simply dyes the plastic as it dries. It spreads easier, and can get into cracks better… but it also needs to be imported.
Mechanical pencils work shockingly well but do much lighter lines. I used the Sharpie Pen for this kit, as I wanted the darker lines.
If you wish to go above and beyond, Bandai offers waterslide decals for many kits as bonuses or replacements. These are thin sheets of plastic adhered to paper. When wet, the plastic slides off the paper and can be slid into the proper place. These are commonly seen on military and science fiction model kits in America, and can both be rewarding and a pain in the ass.
Older Master Grade kits also featured dry-transfer paint details. These would be sheets of plastic that could be rubbed hard, or heated, to slip their paint onto the plastic piece. These aren’t commonly used as much these days, since they were incredibly hard to use accurately.
Even when you’re not using paints or stickers, mistakes are going to happen. After all, these plastic kits are often being built with metal tools. Scrapes, dings, and dents can happen to any kit. This happened to me while I was working on one of the shoulders of the Wing Zero Custom:

It isn’t big, and it doesn’t look like much, but I shaved the plastic a little too deep and caused a dent. While I won’t see it, as this is on the back of the shoulder, you can have a mistake happen in a much worse place. But that’s ok!
Model kits are an art form, not a science. You can easily cover up mistakes with a bit of creativity. Did you do what I did, but can’t stand the divot? Try doing some panel lining on the shaved piece!
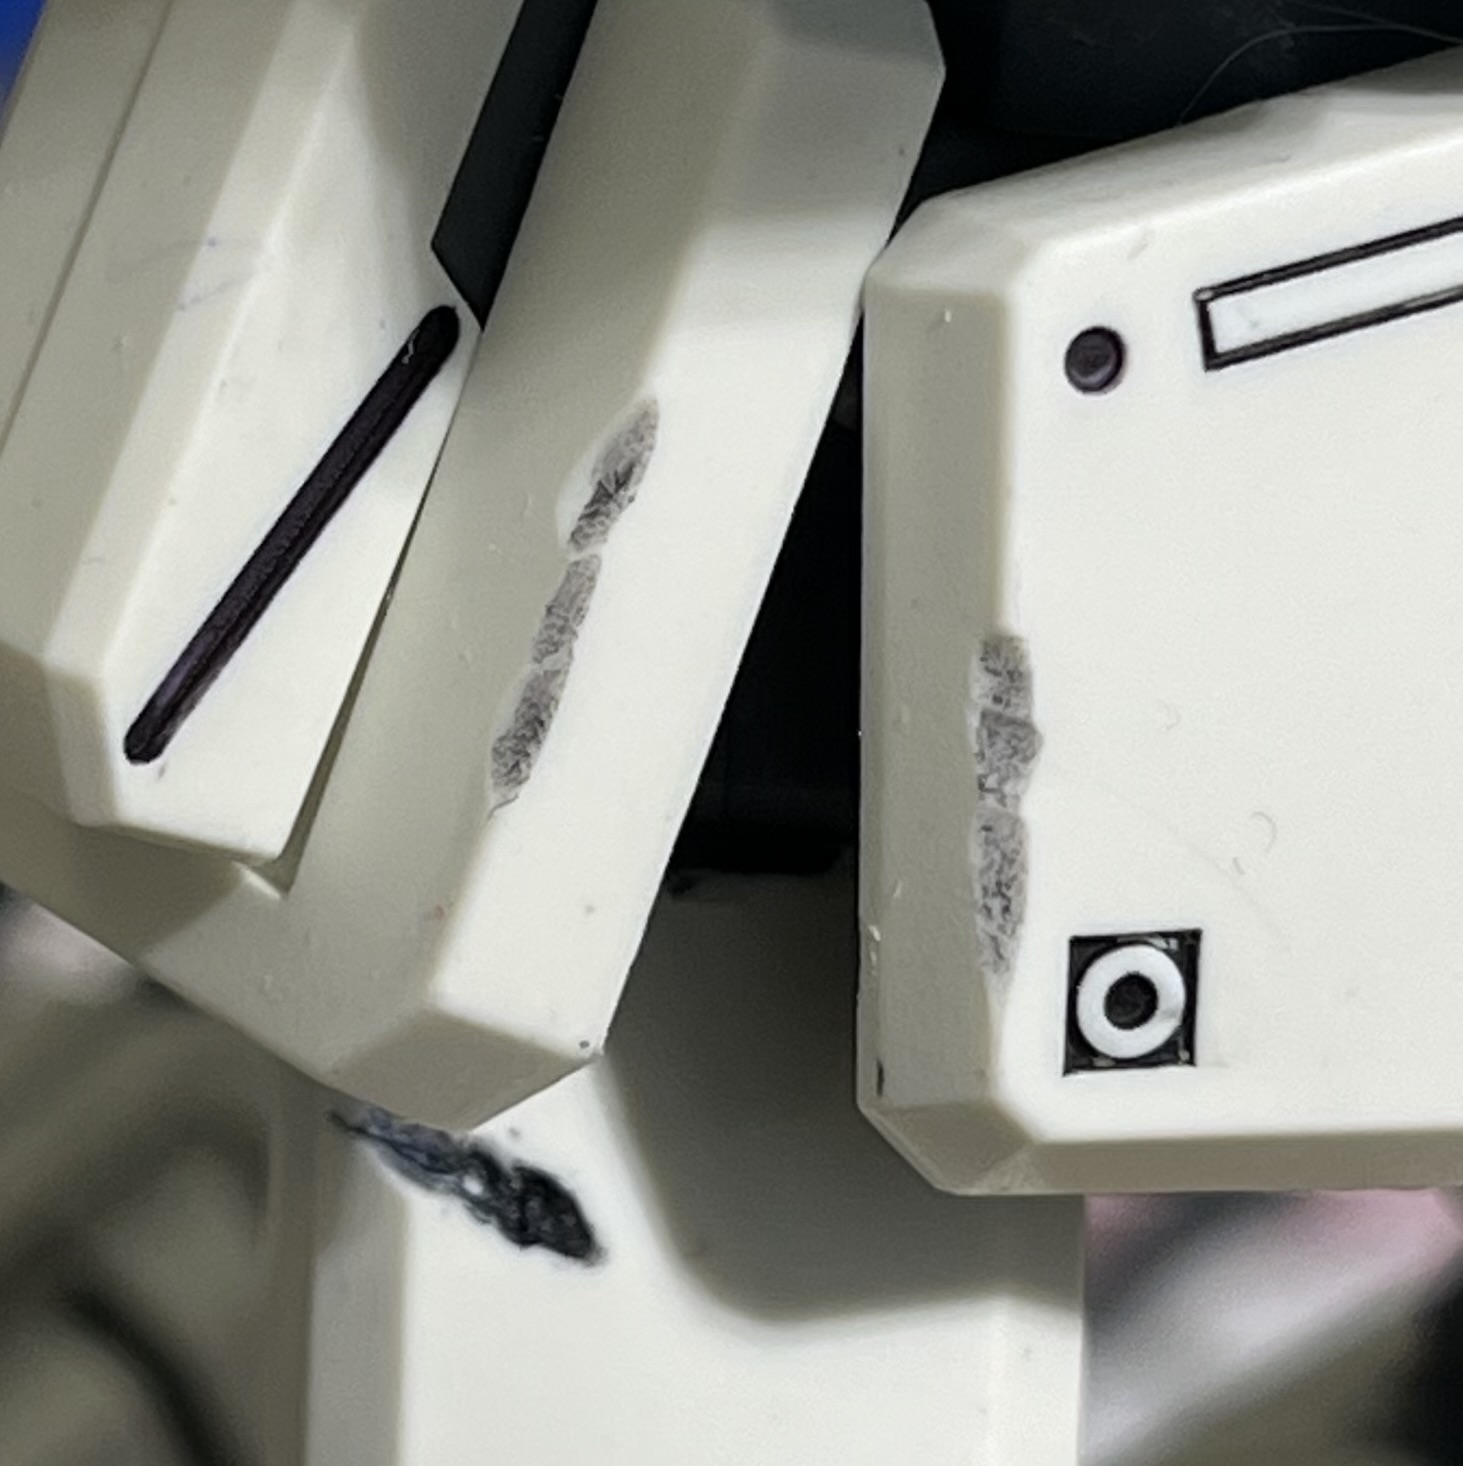
Now, this was me intentionally damaging these parts. However, the effect is the same.
Why it looks like this unit’s armor took some damage in combat. What a shame. But now it can wear those bits of warped armor like a badge of honor! You can get really artistic with it, though others like to take a tiny bit of modeling clay and use it to fill in those weird bits.
Whatever you decide, though, it’s your kit. Embrace the fact that you’re only human!
Now, there is something else you can choose to do. Since this is a plastic model kit, and you may have placed stickers or paint on it, you may wish to preserve those things a little. I do as well, and I use a finishing spray on the Gunpla when it is completed – or close to.
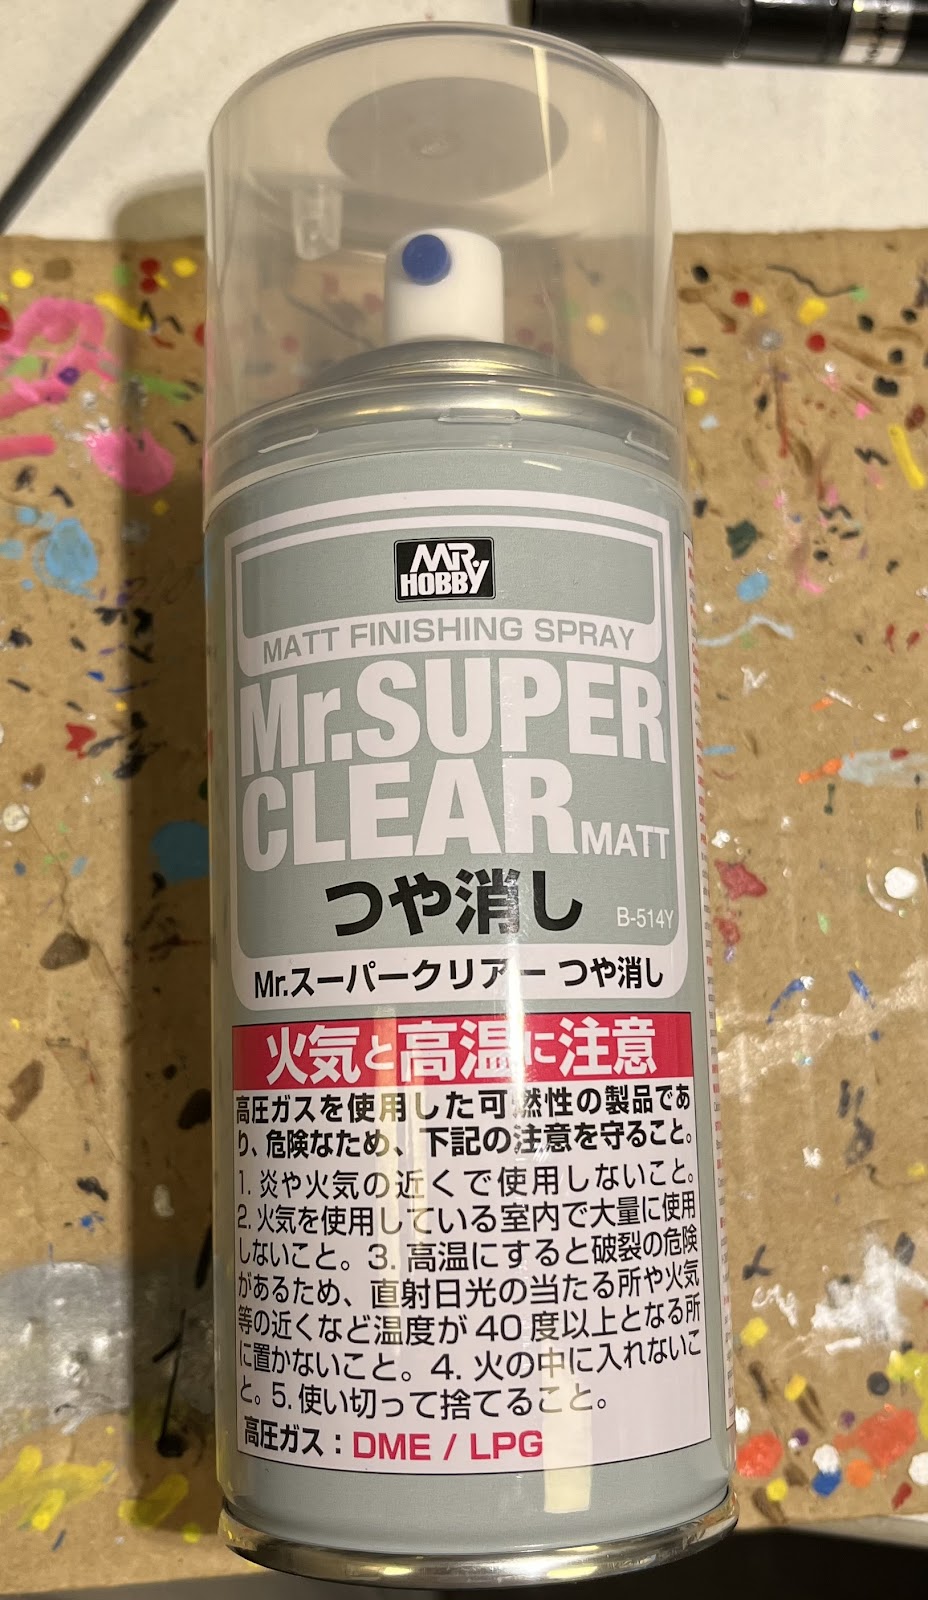
Mr. Super Clear is a spray from Japan made for this. My local hobby store happens to have the matte version, which I prefer. This deadens the shine of the plastic, which both darkens the colors slightly and also makes the model look like it is made of heavier materials. It’s not for everyone, but it can make your kit look great.
And, of course, if you would rather not import this, any finishing spray that works with plastics and their paints is just fine.
NOTE: edit these together

So, I should have totally removed the clear plastic chest piece before spraying. Live and learn!
It’s just a touch less shine, a touch more color absorption, and it preserves any and all painting you may have done.
If you choose to spray, I recommend doing it in a well-ventilated area. While it’s not toxic, Mr. Super Clear reeks of dry-erase markers. It takes time to dry as well. Touching it before it is dried tends to leave nasty fingerprints. So I recommend erroring on the side of caution. You also may wish to spray before the kit is fully assembled, so the spray can coat the entire kit rather than just the visible parts.
But again, totally not needed if you don’t want it!
Once you’re finally done, you should have something worth displaying:
Most kits can stand on their own, but the Wing Zero Custom really can’t. Regular grade, high grade, real grade, master grade, none of them can really stand on their own well. Luckily, Bandai saw a flaw in their designs and produce stands for their model kits.
Some model kits do come with an inexpensive stand, such as this guy:
High Grade 1/144 AGE-FX Gundam AGE-FX
Other kits come with adapters to allow your model to fit onto the plain stands, and still, others don’t have any stand compatibility at all. Stands are a relatively recent addition to Bandai’s catalogue, and there are many kits that predate them.
They aren’t necessary, but they can be awesome.
Now, there’s something I also need to add: older kits can also be awesome too. Bandai has been making Gundam models for over 40 years, and there are some real gems hiding in the 90s and 00s. For example, there was a side story to 1995’s Gundam Wing called G-Unit that had modular mechs as the focus. Inside this side story, my favorite unit: the Aesculapius.
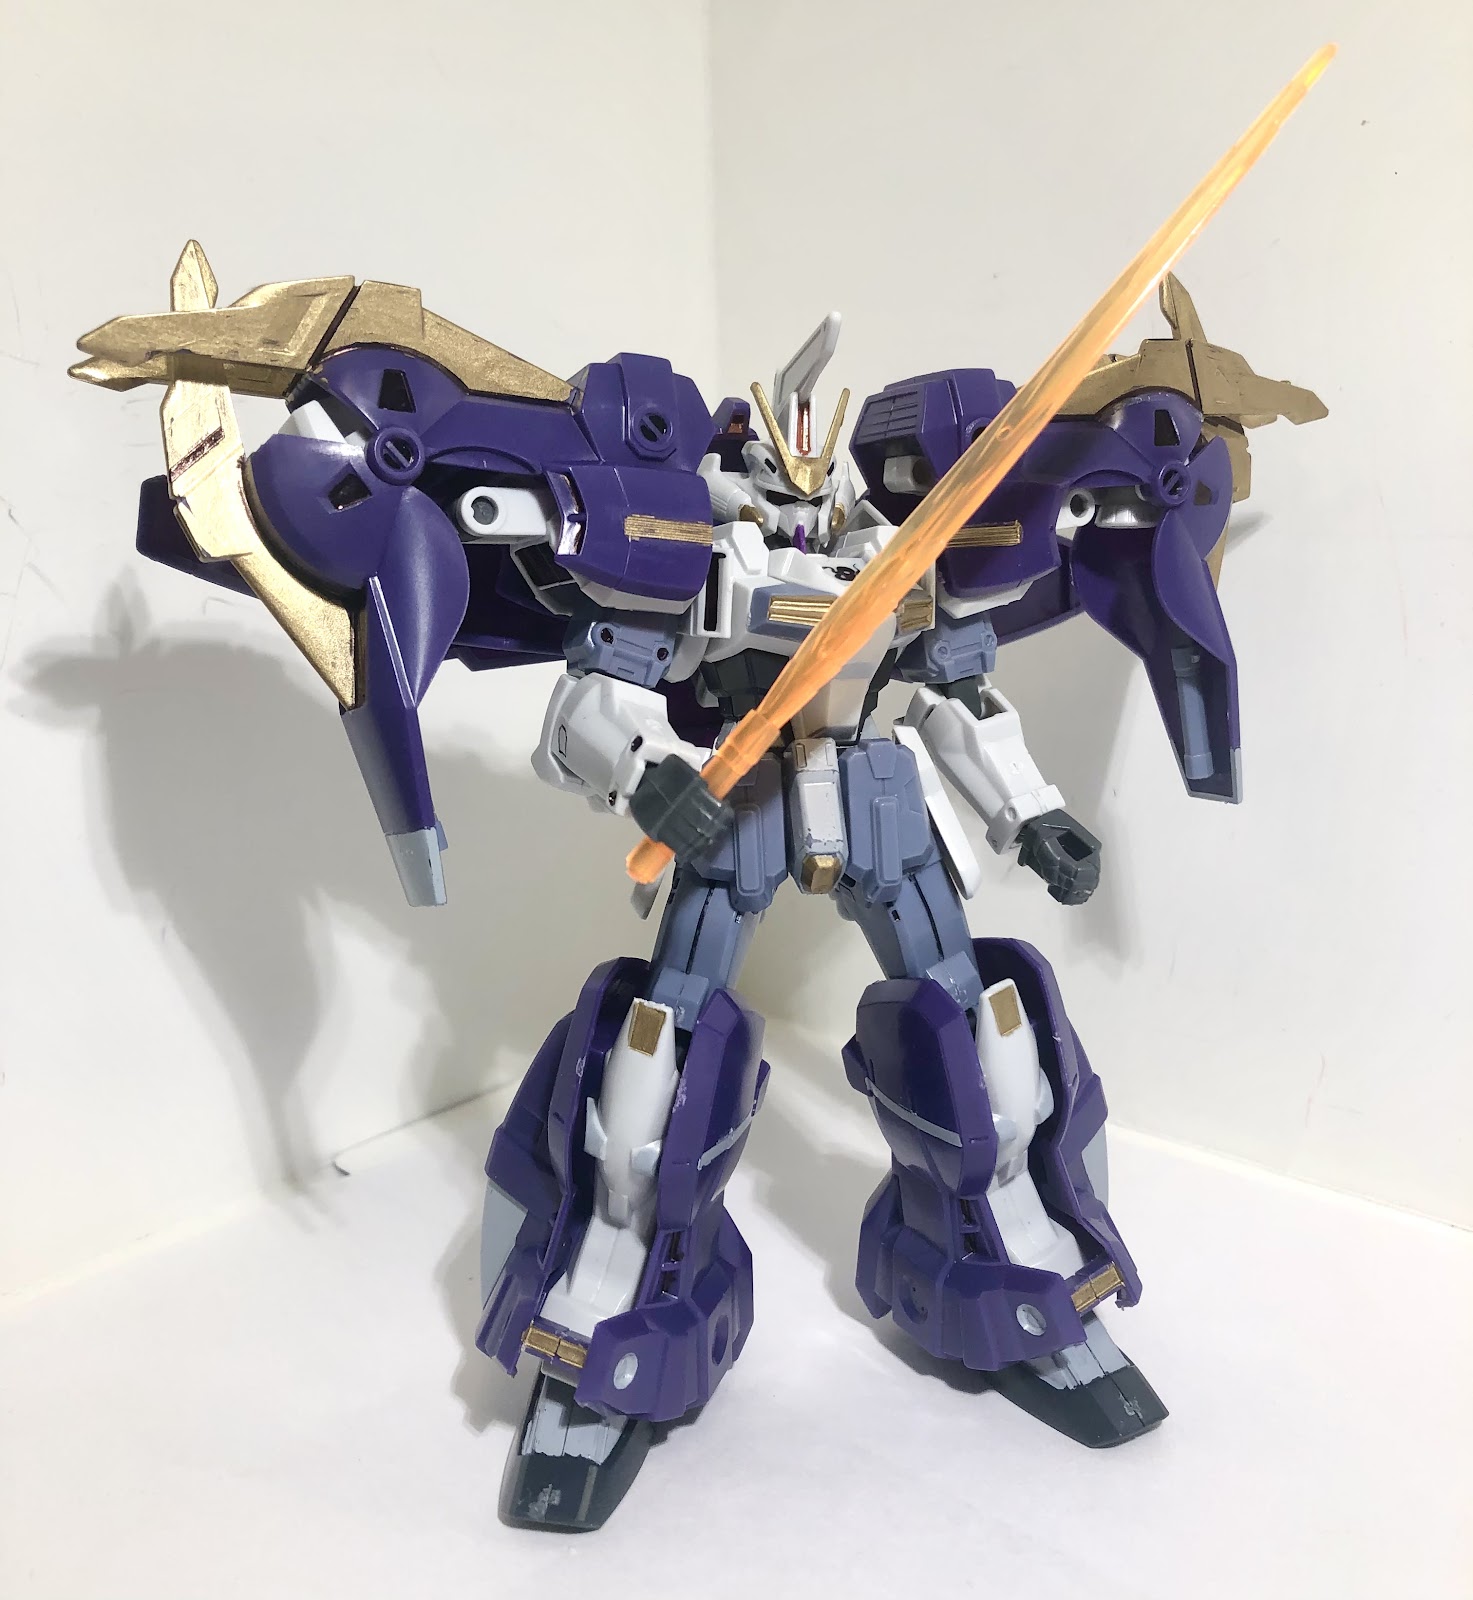
1/144 OZ-10VMSX Aesculapius.
Aside from the truly incredible and regal shoulders, why else do I like this guy?
1/144 OZ-10VMSX Aesculapius.
It has a crab mode, and it is amazing. The claws, the weird crown for the robot head, the massive shoulders, it’s just gloriously stupid fun to me. The articulation is fairly basic, and details aren’t super intense, but it’s all about the design rather than the kit itself.
1991’s movie Gundam F91 had a side story called F90 about Gundams hanging out around Mars. There, you can find several 1/100 scale kits that feature mobile suits that have a ton of option parts slapped on them. As such, they can look absolutely weird, but that works for me.

1/100 F90P Gundam F90 Plunge Type.
This guy is somehow designed for atmospheric re-entry. As such, he has a bunch of rocket boosters and wings. This model also includes parts to make the standard F90, and it can also equip the other F90 modular part kits made at the time. However, there is no waist articulation due to Bandai experimenting with a new way to inject different colors into the same piece of plastic. The arms are also floppy, but the overall experience is pretty great.
Bandai has recently revisited the F90 line with a bunch of online and Japan-only exclusive equipment packs. Super expensive, but worth it to those dedicated fans.
However, I do recommend caution going back further than 1988 in terms of when the kits were made. Bandai was able to greatly improve upon the early kits with flexible joints using rubber bits, and they snap together solidly. Going back before 1988, you will find kits that need to be sealed with superglue, have joints that run hard plastic together, might only be made with one or two shades of color, lack stickers entirely, and demand high amounts of patience and paint to look even decent.
That said, you can also find some real gems in this era.
1/144 FA-010A FAZZ
This is the FAZZ, short for Full Armor ZZ Gundam. It’s a mass-produced heavily-armored version of the main character mech from 1986’s ZZ Gundam. This kit comes from 1988’s Gundam Sentinel line and actually re-uses the 1/144 kit from 1986 as the base ZZ unit. The kit includes the armor to be liberally glued on top and painted, as well as the massive gun.
Amusingly, the accurate scaling of these kits means the 1988 armor for the FAZZ is compatible with the 2010 1/144 HGUC release of the same design. This allows you to have a much more updated iteration of the FAZZ, leaving you with an ancient ZZ kit to enjoy.
1/144 MSZ-010 ZZ Gundam. Behold, the power of two shades of plastic!
And if you’re really up to feeling courageous, there’s the MSV line from the early 1980s. This line featured weird variants that are barely remembered in the modern-day. While the kits will take a lot of love and work, it’s almost worth it to see guys like this.
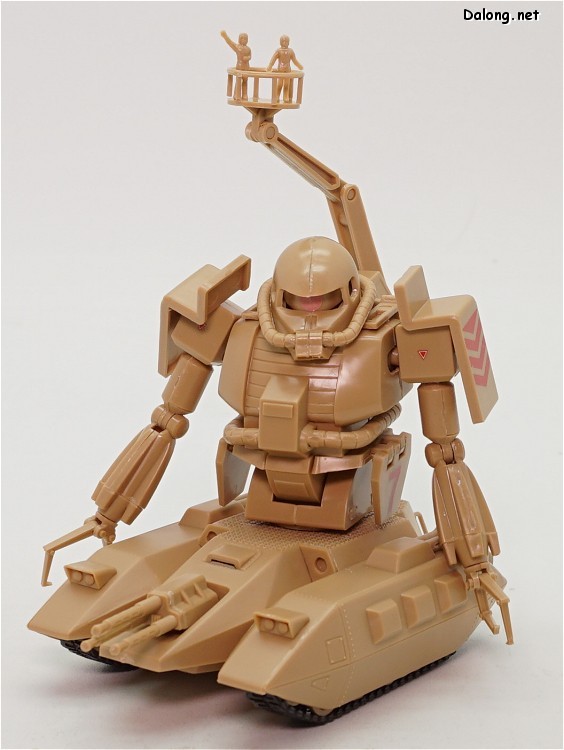
1/144 MS-06V Zaku Tank.
Why yes, that is a tank-treaded robot with claw arms and a cherry picker basket for reasons known only to God. It is amazingly stupid, but no other kits of this guy have been made. If you want one in your collection, it’s time to get working with ancient materials.
If you wind up feeling courageous enough, you can even do custom kits outside of the add-on kits. These can include battle damage, paint jobs, or anything your imagination desires. Do you want to re-create an iconic moment from the show? Fire away!
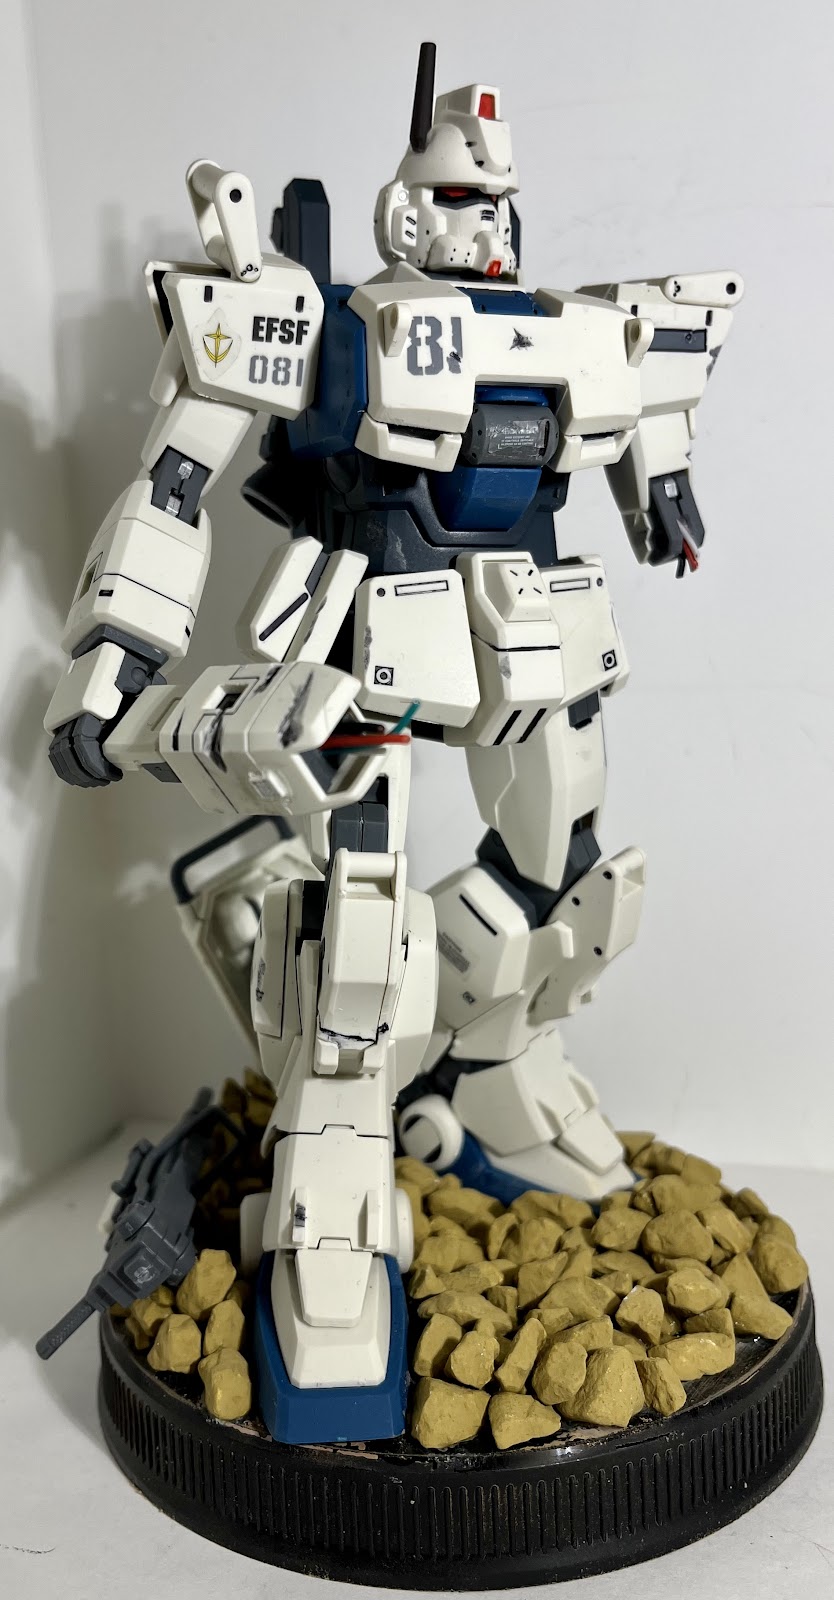
Master Grade 1/100 RX-79[G]Ez-8 Ground Gundam Ez-8
What about using the same kit to make an alternate color scheme for your favorite obscure units? Do it!
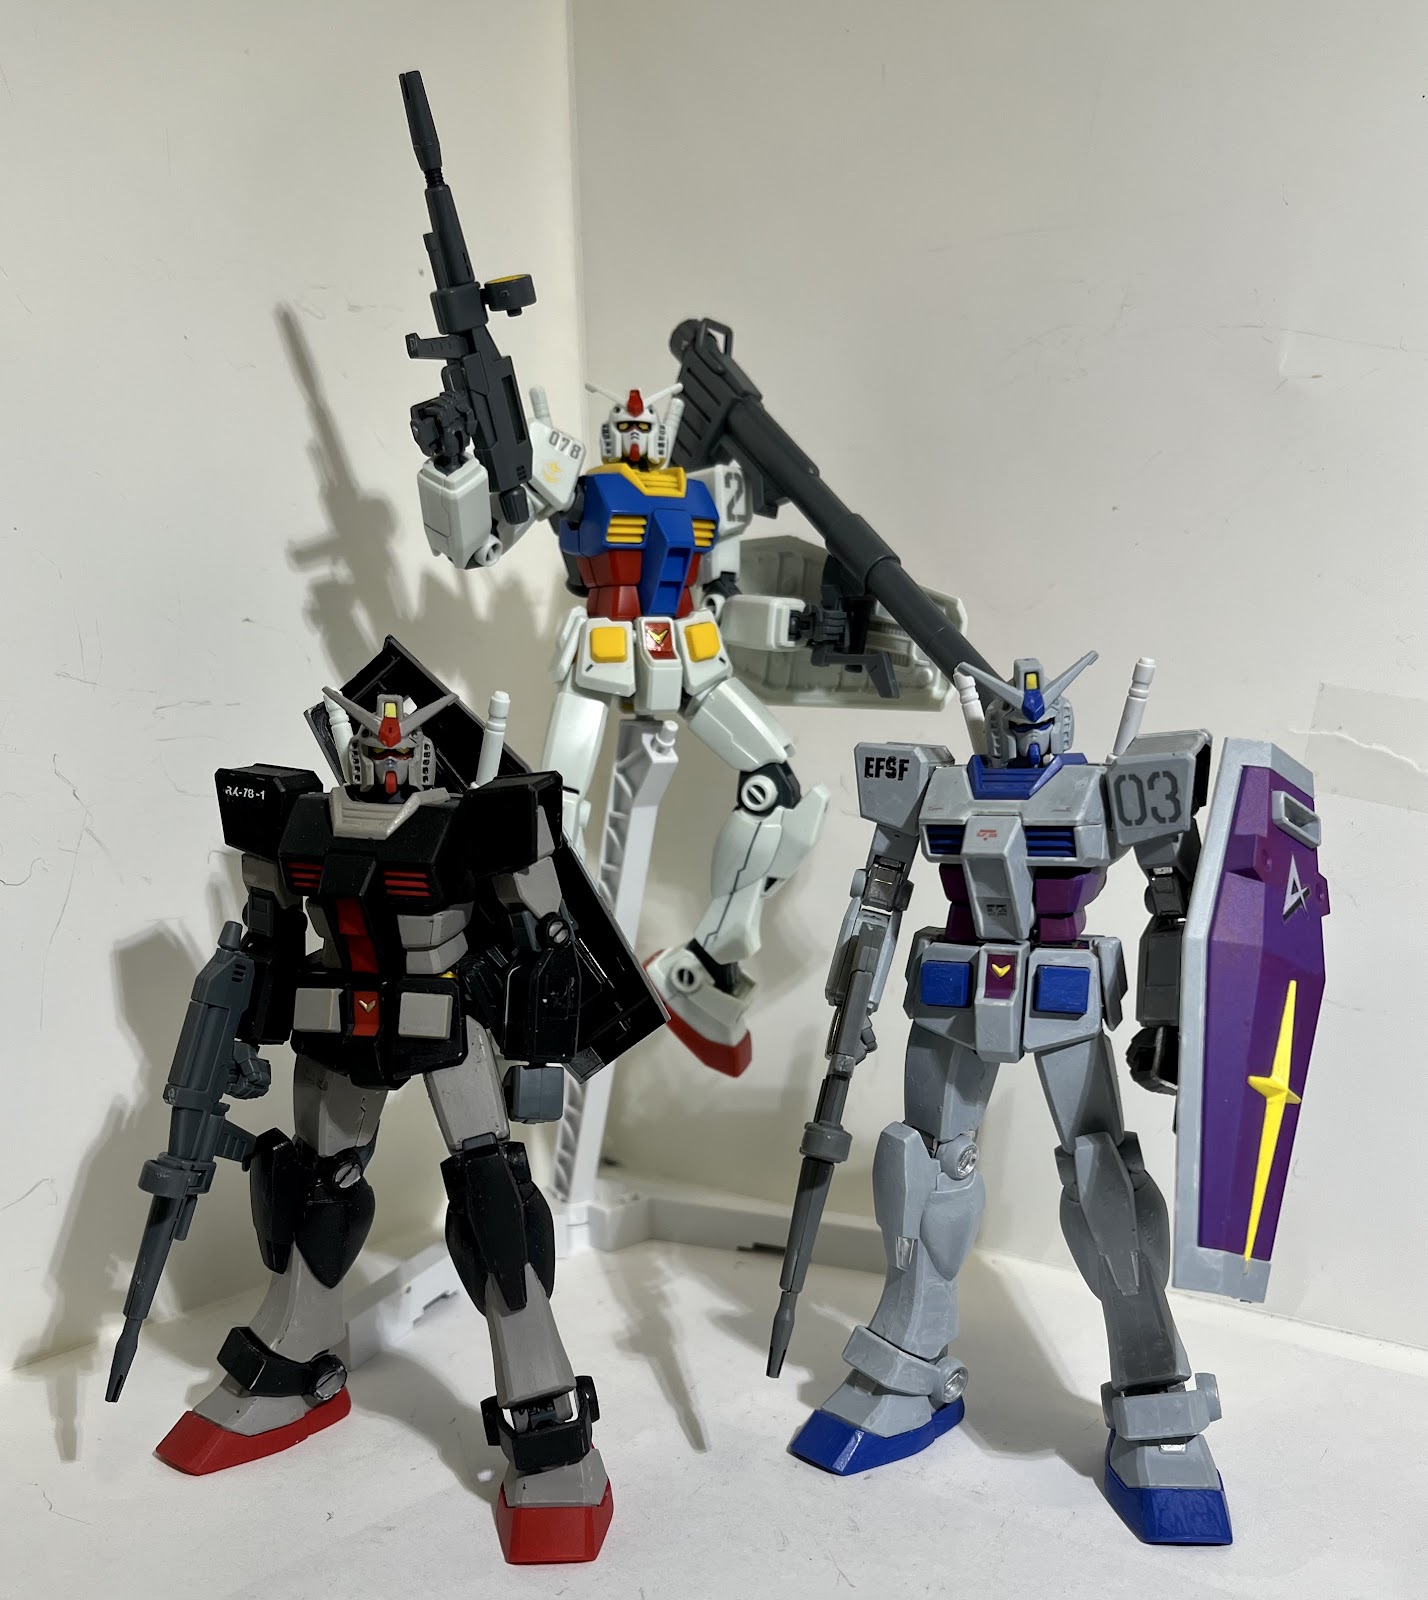
Left to right: RX-78-1, RX-78-2, RX-78-3. The 1 and 3 are hand-painted but follow their canonical colors.
And what about your own monstrosity made out of multiple model kits? Or buy one of those weird add-on kits? Yeah, that works too!
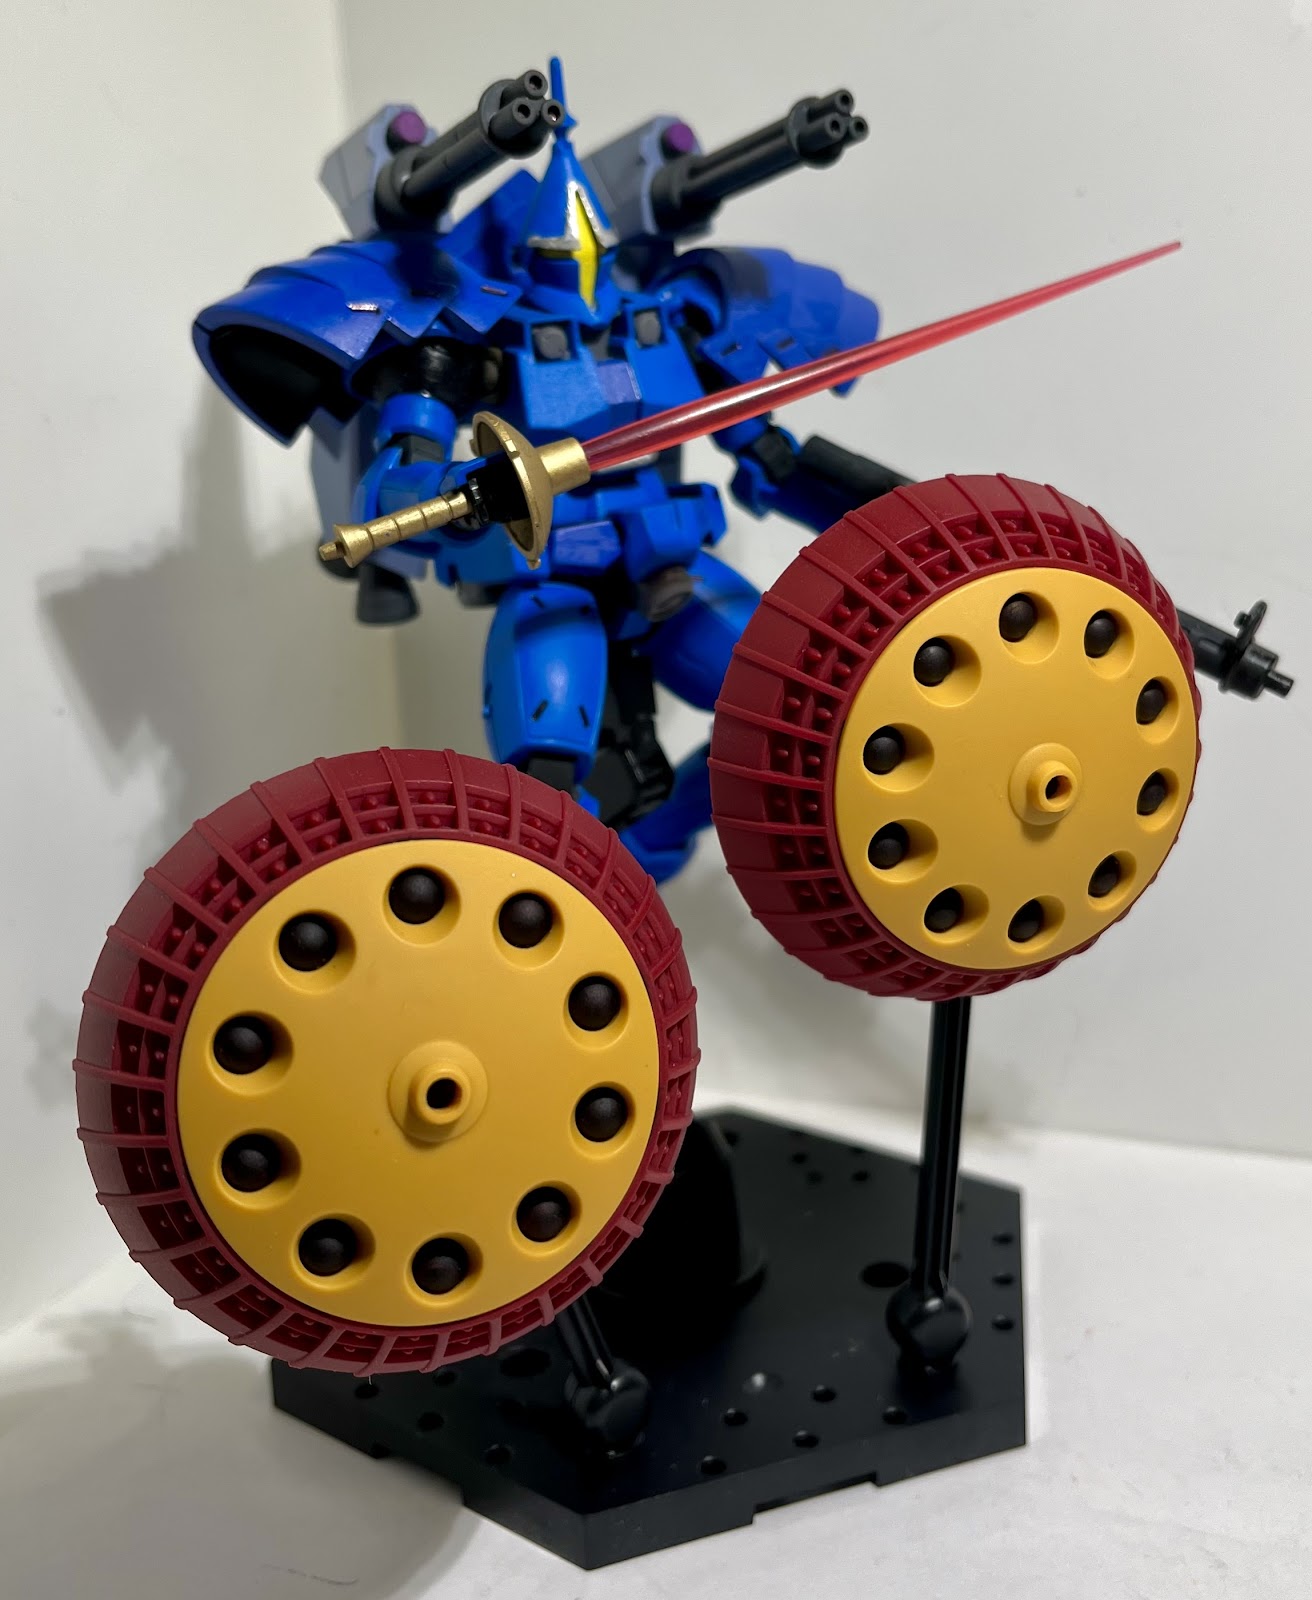
Kits used: 1/144 HGAC OZ-06MS Leo and the Build Custom Valuable Pod add-on kit. I still don’t have a name for this guy.
Like with imagination itself, the sky is literally the limit. Have fun, and build the mech of your dreams!


